How To Start Sending Invoices To Your Clients?
Written by Mindaugas on March 09, 2020
Sending invoices to your clients is a great way to improve business transparency and bolster cash flow. Perhaps you are considering using our invoicing platform InvoiceBerry to begin creating and delivering invoices – it’s really simple. This post will guide you step-by-step through the invoice creation process using our platform.
Now before I begin with the walk-through, I’d like to go over some of the benefits invoicing software such as InvoiceBerry can endow your business with. Some of these benefits include –
Try our online invoicing software for free
Accept online payments with ease
Keep track of who's paid you
Start sending invoices
- Aforementioned increase of fiscal transparency of your business;
- Setting up and delivering invoices in just a few minutes;
- Offering your client a variety of payment options to choose from;
- Sending invoices online minimizes waste;
- With InvoiceBerry, you can invoice your client in hundreds of different currency options. Great to use when you or your clients are located in different parts of the globe;
- Easy to track clients and their outstanding debts;
- Automate invoice delivery and payment reminders;
Let’s begin!
When you visit InvoiceBerry.com, you will be greeted with our homepage. Here we outline the primary functions of our invoicing platform.
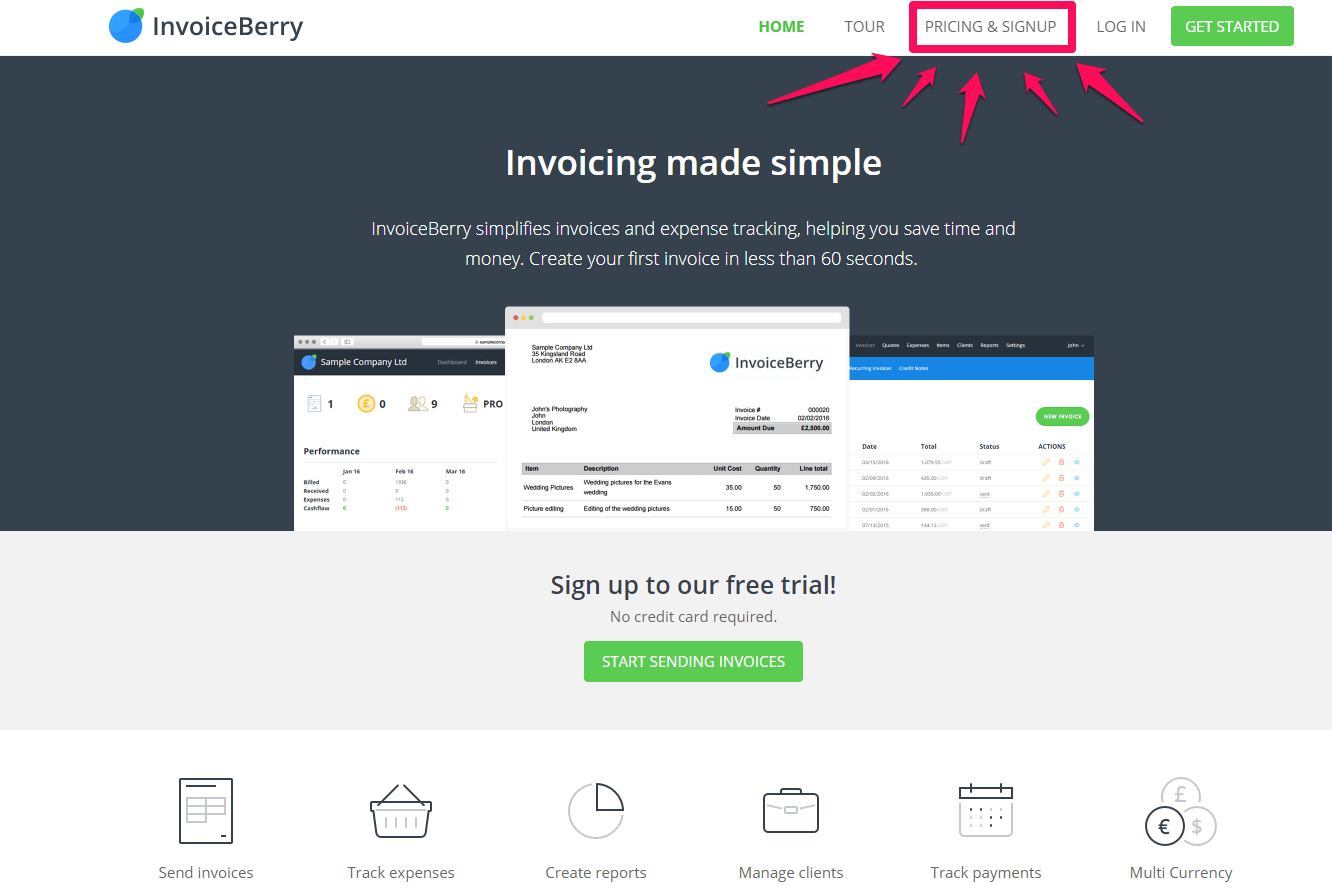
As the text in the center indicates – you can start a free trial. There is no need to enter your credit card information to proceed. The free trial lasts for 30 days, after which we use a subscription based payment model.
You can view our available software plans at the top right by pressing “Pricing and Signup”.
Two subscription options
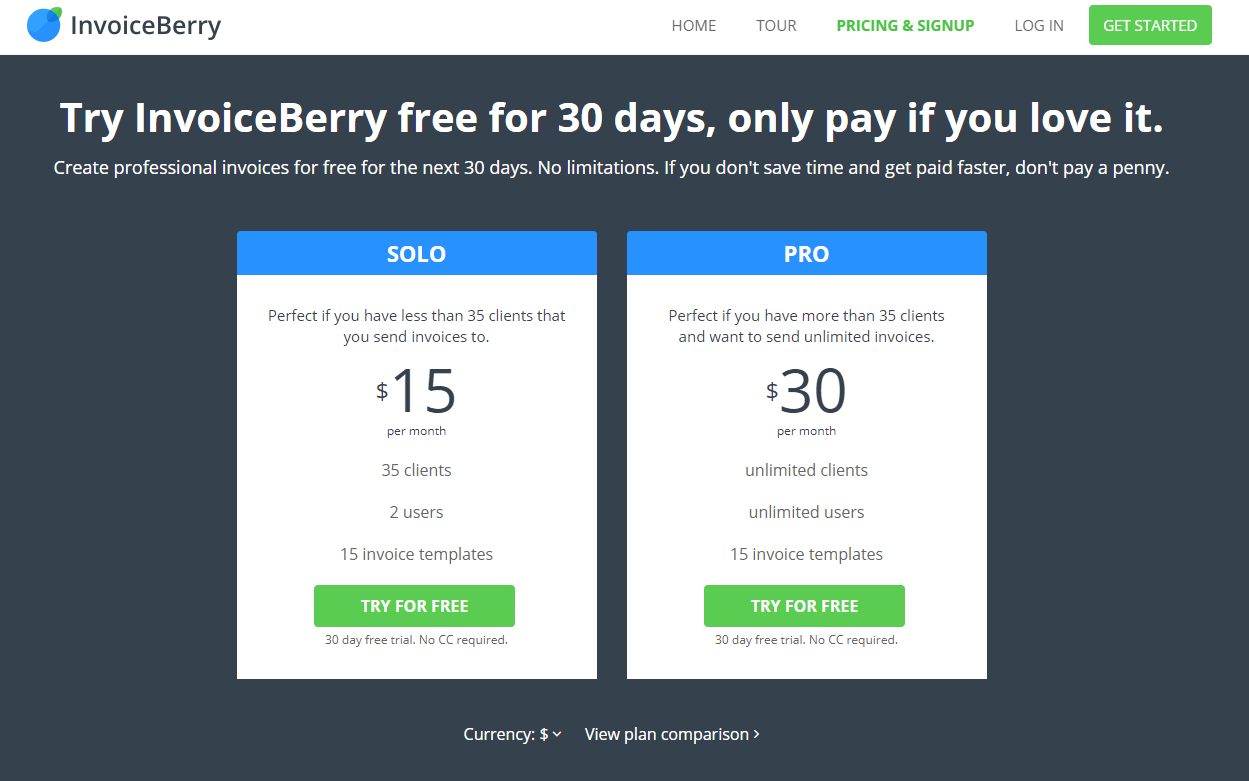
As you can see in the image above, we offer two subscription options for you to choose from. Select the option that suits your needs the most to begin your free trial.
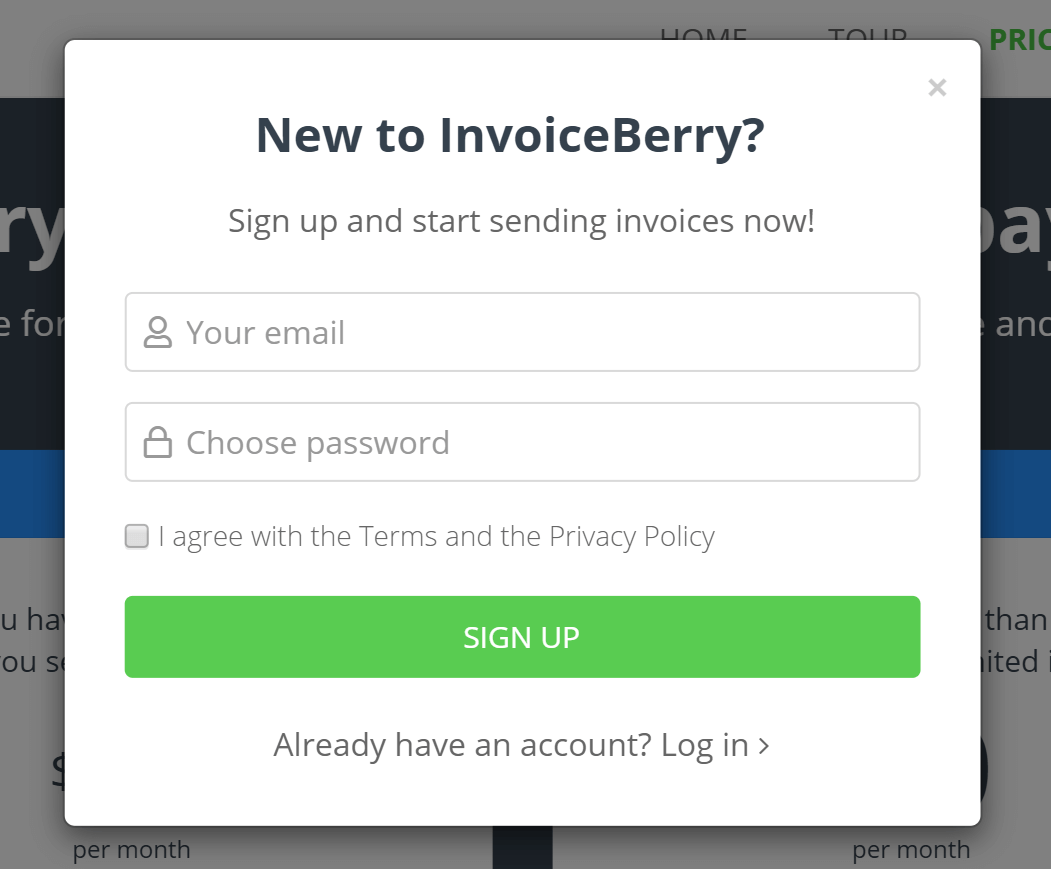
The signup process literally takes just a few seconds to complete. Type in your email and your desired password to start creating invoices with InvoiceBerry.
Welcome page

Once you have created your InvoiceBerry account, you will be brought to the “Welcome Page”.
Top of the page you will see the Menu, on the right side of the screen you can view the invoice tutorial video.
Buttons labeled “1” directs you to the invoice creation page and button “2” allows you to fill out the form containing pertinent business information.
Your Company Information
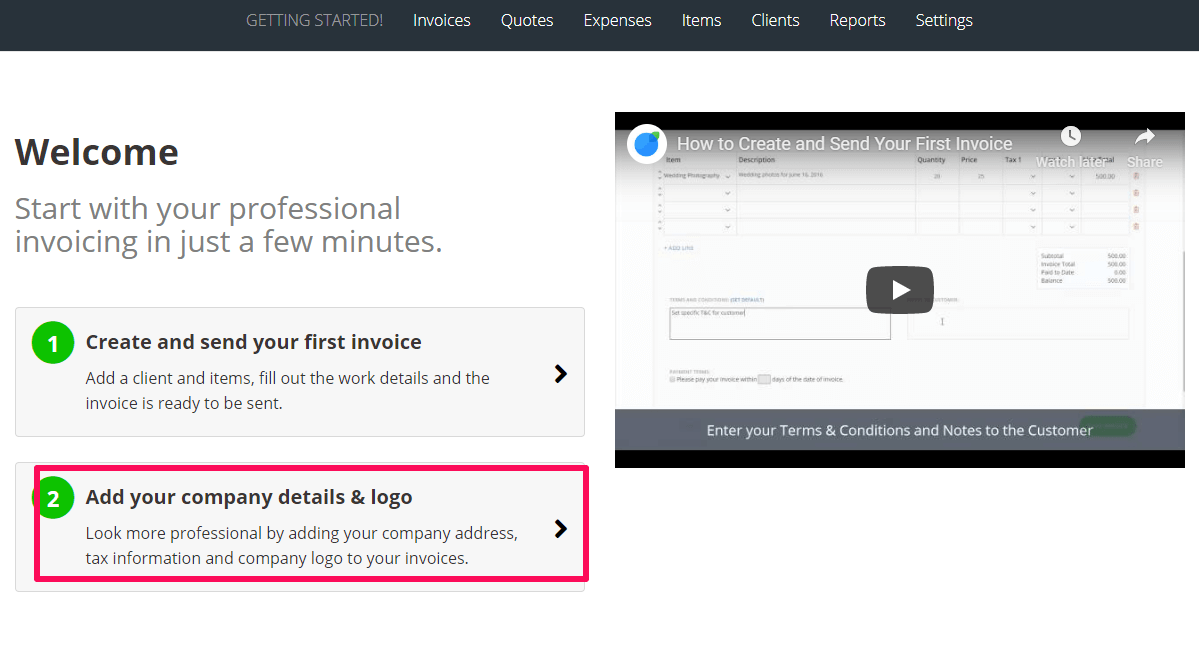
Press the 2nd button – “Add your company details and logo”. The information you enter here will be included on all invoices you create from this point forward.
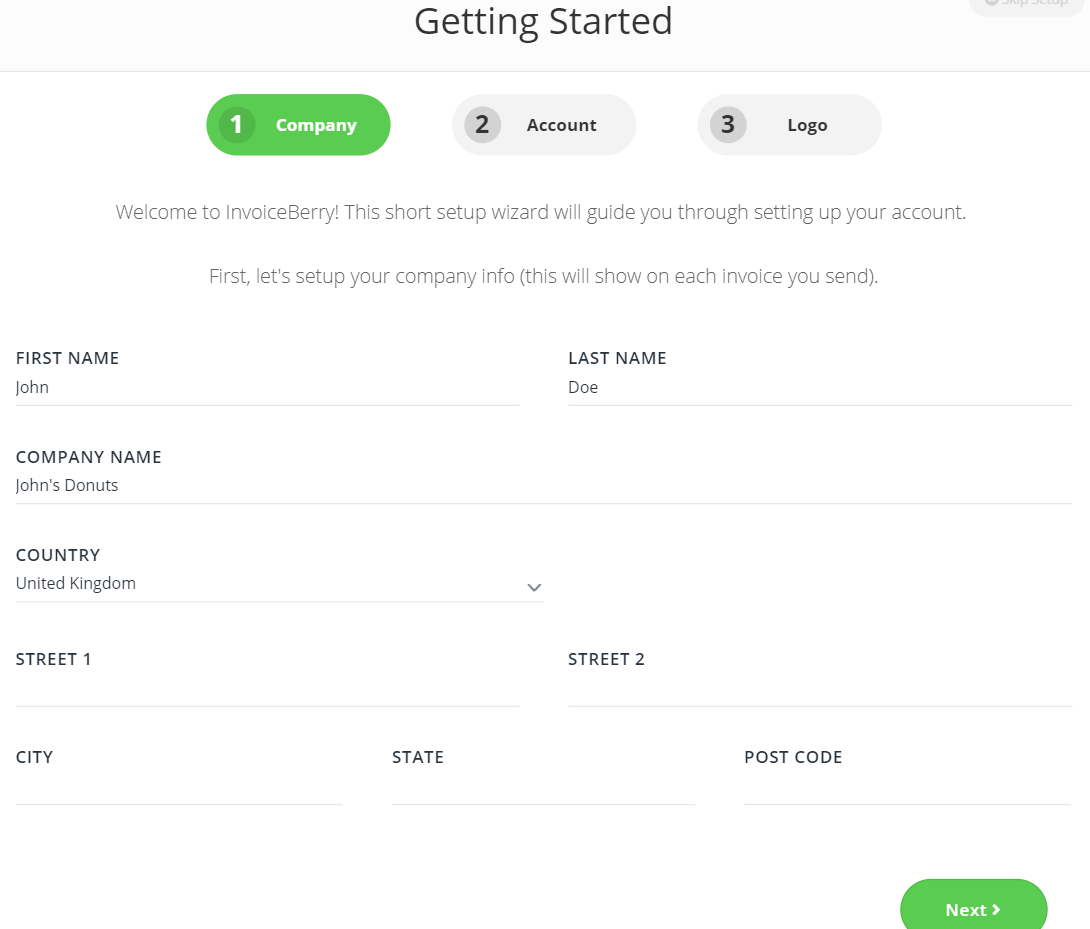
There are a total of 3 pages that should be filled out by you before creating invoices. This information will make it easier for your clients to identify who is invoicing them.
Press “Next”.
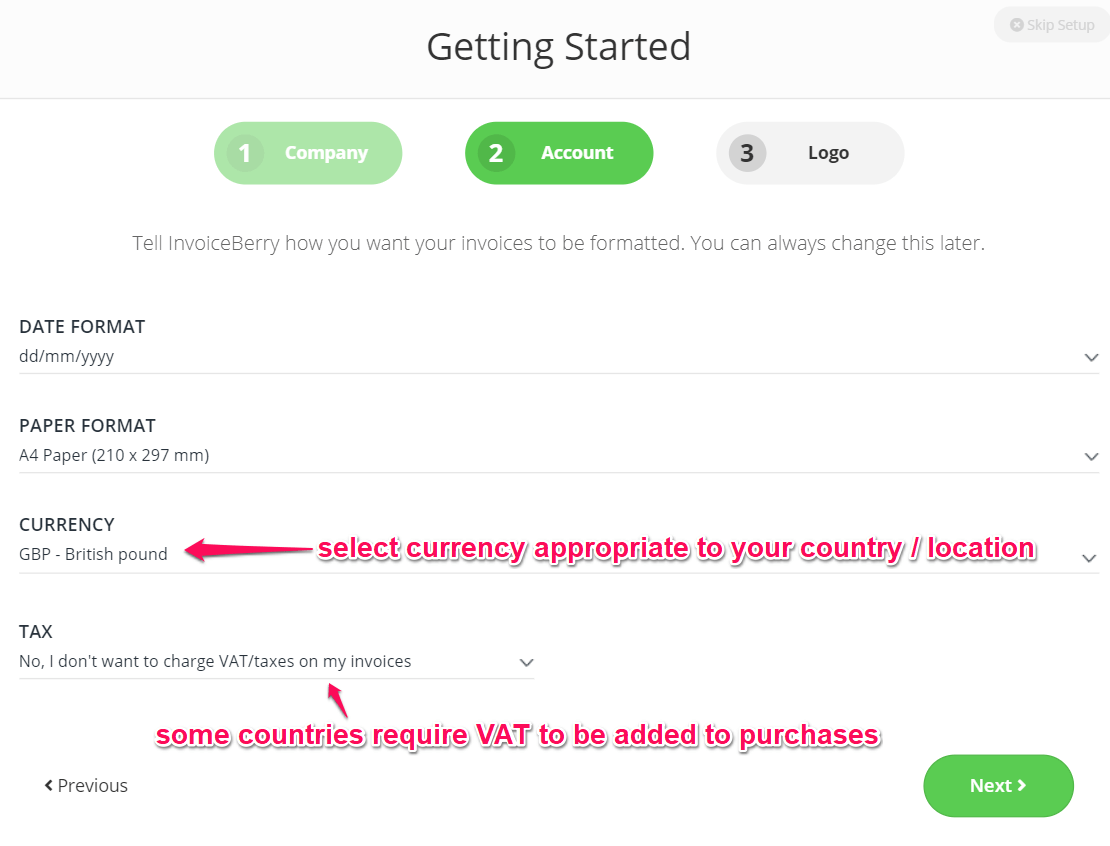
Here is where you adjust the formatting of your future invoices. Date formats may be different, depending on where your operate your business from. Select the appropriate currency that your business works with. The currency may be changed later on if you need to accommodate clients in different geographical locations.
“Tax” line may be used to include tax information – this will depend on the country in which you operate. For example countries in Europe use VAT, so a business operating there may choose to include VAT in the invoices they create and deliver to clients.
If you so choose, you can include the logo of your company on invoices created using InvoiceBerry. This is a great way to start creating brand recognition – small things like a personalized invoices can go a long way in this regard.
Create first invoice!
Okay, so all the vital company information has now been entered. You are now ready to actually create your first invoice using InvoiceBerry.
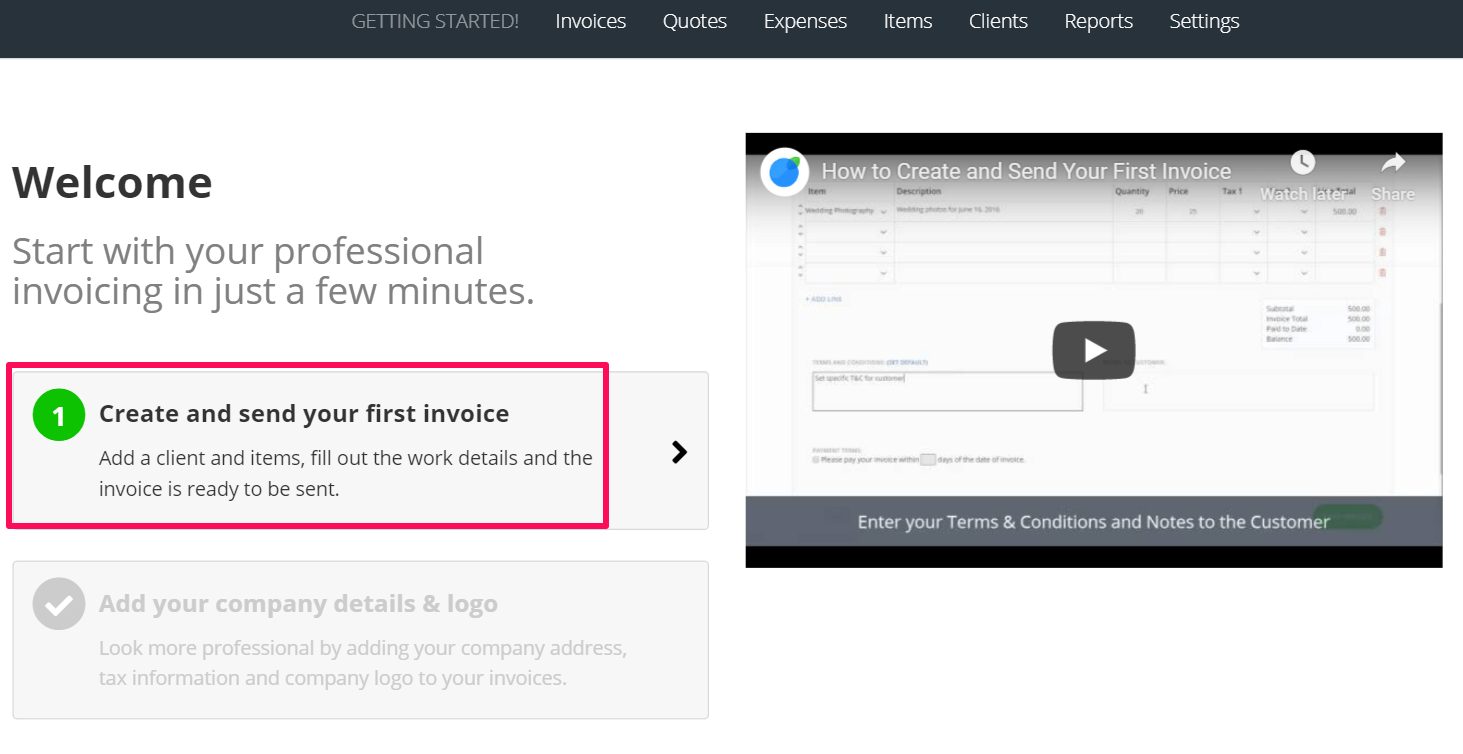
After the information has been entered, you will be brought back to the “Welcome page”. Press on the “Create and send your first invoice” button.
Since you have just created the account, the client list will be empty. You will need to add a client who will end up receiving the created invoice.
Remember that the $15/month Solo subscription gives you the ability to include up to 35 different clients, the $30/month Pro subscription allows you to have an unlimited amount of clients in your invoicing list.
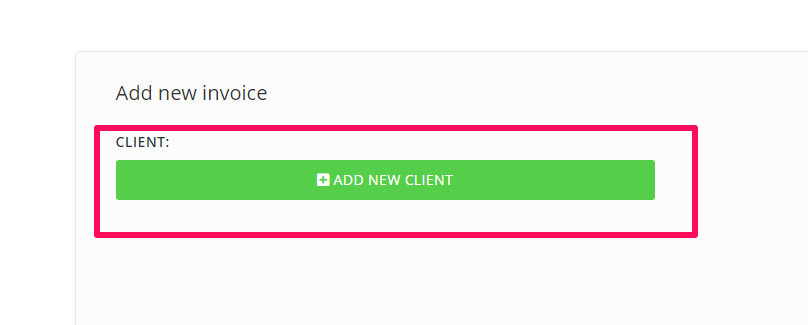
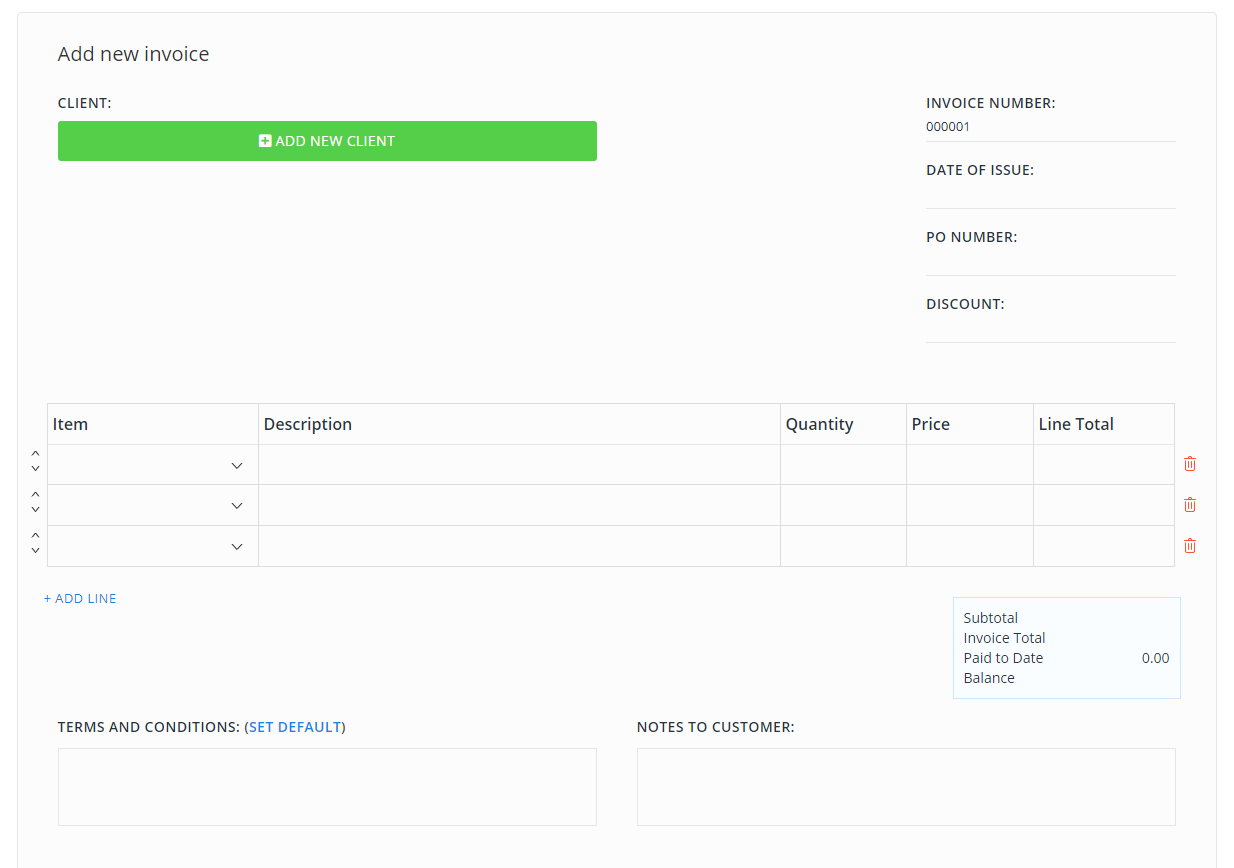
Go ahead and press the highlighted button “Add new client” to add your very first client to your invoicing list.
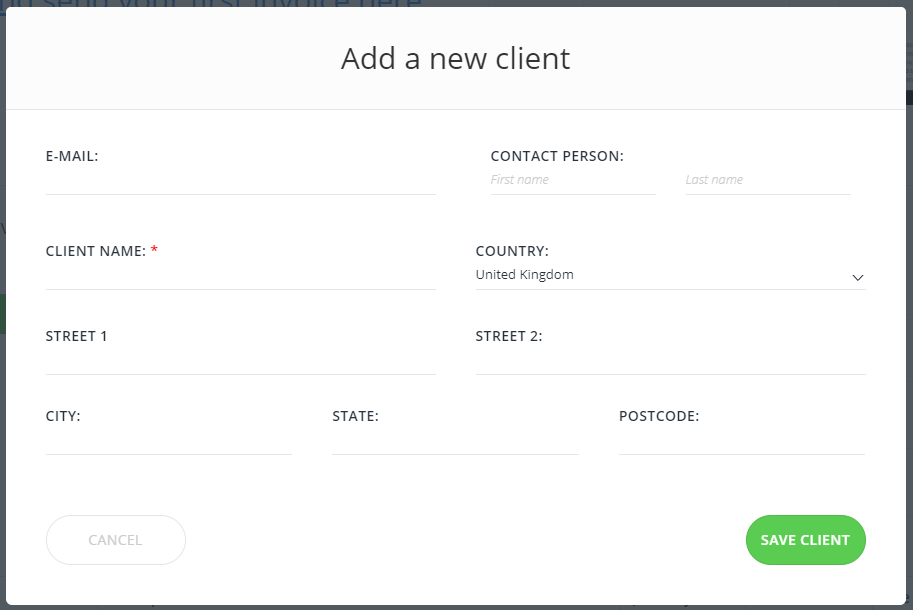
Enter all relevant information pertaining to your client. Client’s information will be automatically included in any invoice that is created specifically for them.
One thing to take note is that the Email field is not required. However you need to fill in the email if you should choose to invoice clients via email.
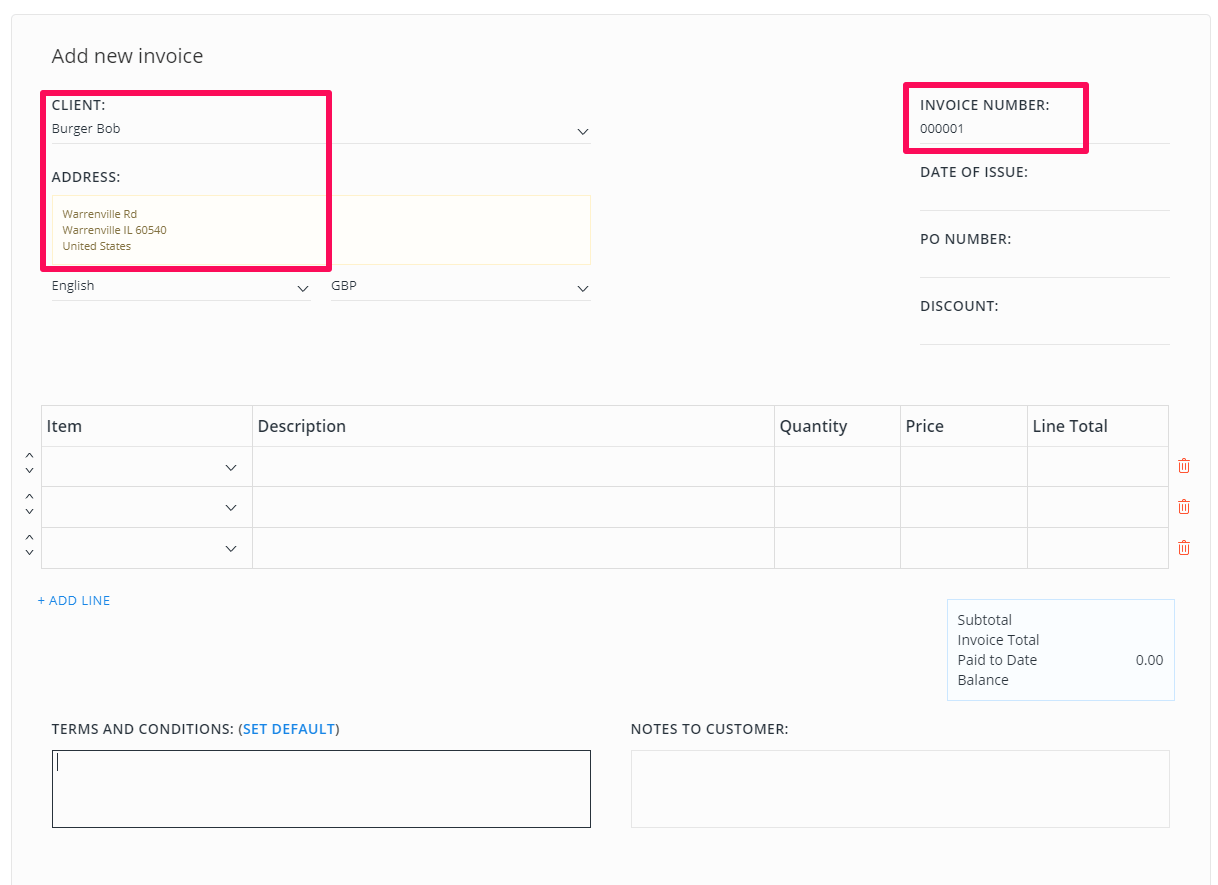
Once you have entered your client’s information and pressed Save Client, the client will appear at the top right of your blank invoice page. All your clients will appear in a drop down menu, so you can switch to any appropriate client for the particular invoice you’re creating.
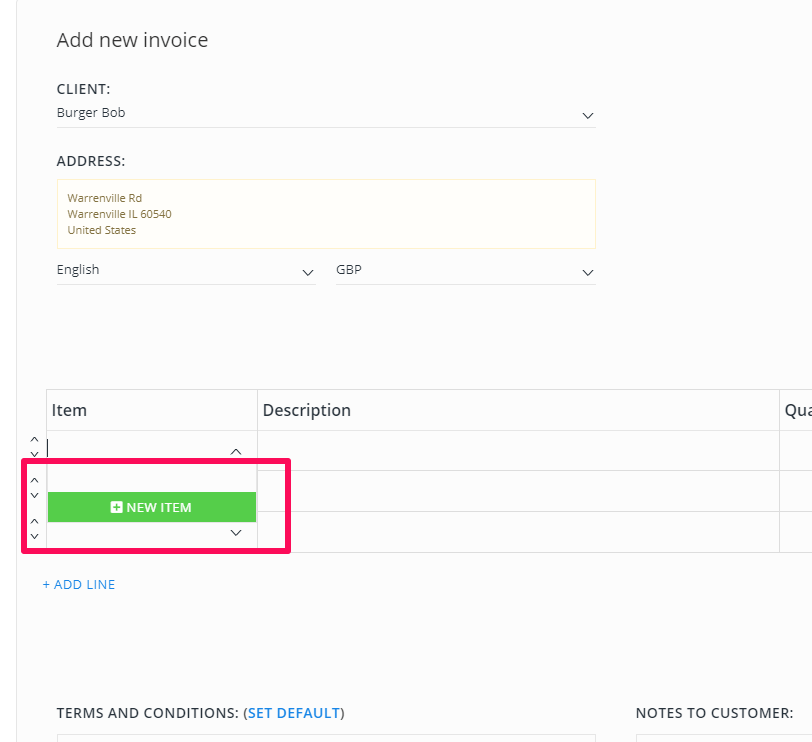
It’s time to include the item / service for which you are invoicing. In the empty table, press on the drop-down menu button on the left to add an item.
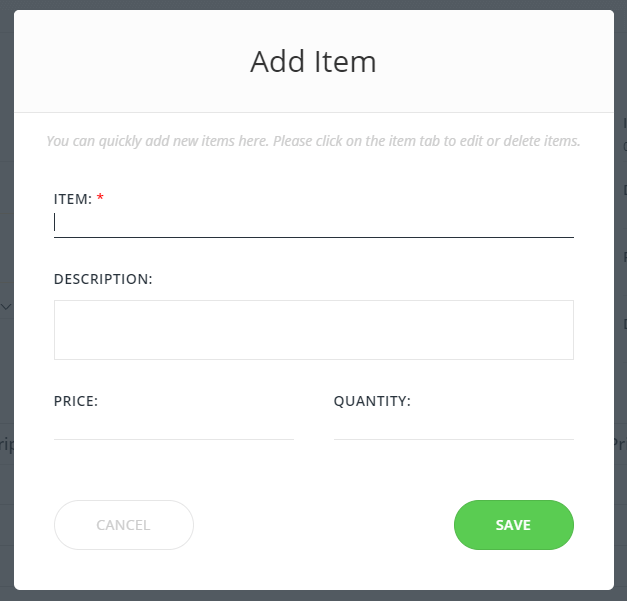
Once you have pressed “New item” in the drop-down menu, you will be presented with a new screen. Here is where you will need to add the particular item and its details for which you’re invoicing the client.
Keep in mind, the field labeled as Price is used for per-unit price. If your per-unit price is $2, you will type in 2 into the Price space, and the total quantity sold in the Quantity space provided.
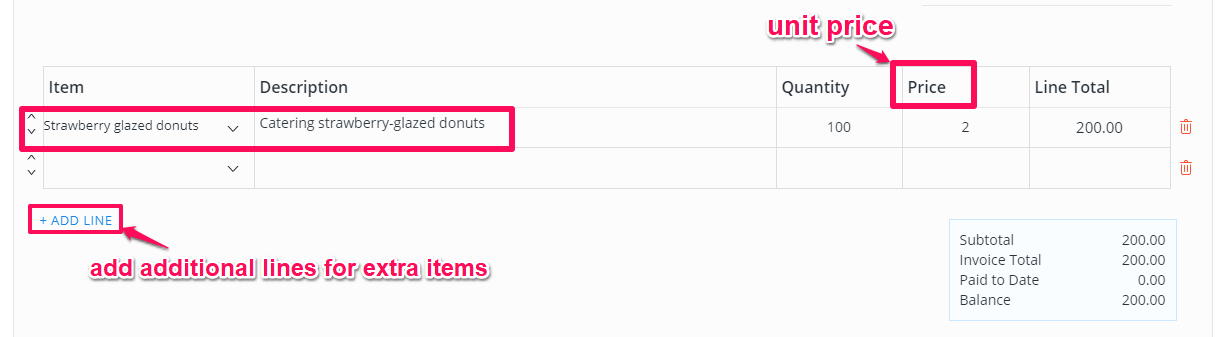
In the example above, you can see that once the item is added to the invoice, the total is automatically calculated by the software.
If you are invoicing clients for multiple items and need more space of itemization, press the “Add line” button. This will create additional item lines for you to use.
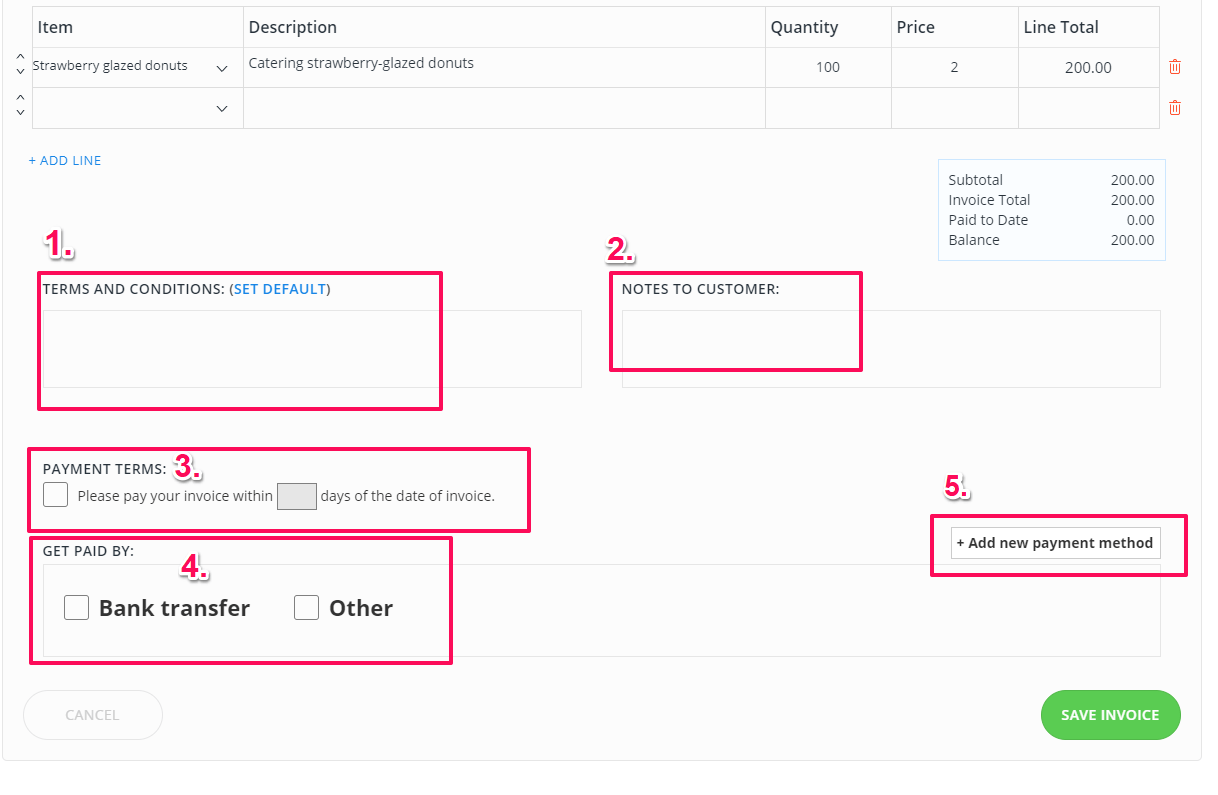
Once all the necessary items have been added to the invoice, scroll down the page. Here you will see the following –
- Terms and conditions – have you discussed any payment terms or conditions with your client prior to invoicing? Consider including them in this space.
- Notes to customer – if necessary, write some notes that you want your customer to know once they have received the invoice.
- Payment terms – this is different from “Terms and Conditions” field. Here is where you will include the amount of days your customer has before the payment is due.
- Get paid by – you can select the most common payment method you want your client to use. Variety of payment options are available.
- Add a new payment method – select other available payment methods that suit the needs of your clients.
Fill all this out in accordance to your needs as well as your clients. You want to make it as clear as possible to your client of when the payment is due, what are the payment terms, and what method of payment he or she needs to use.
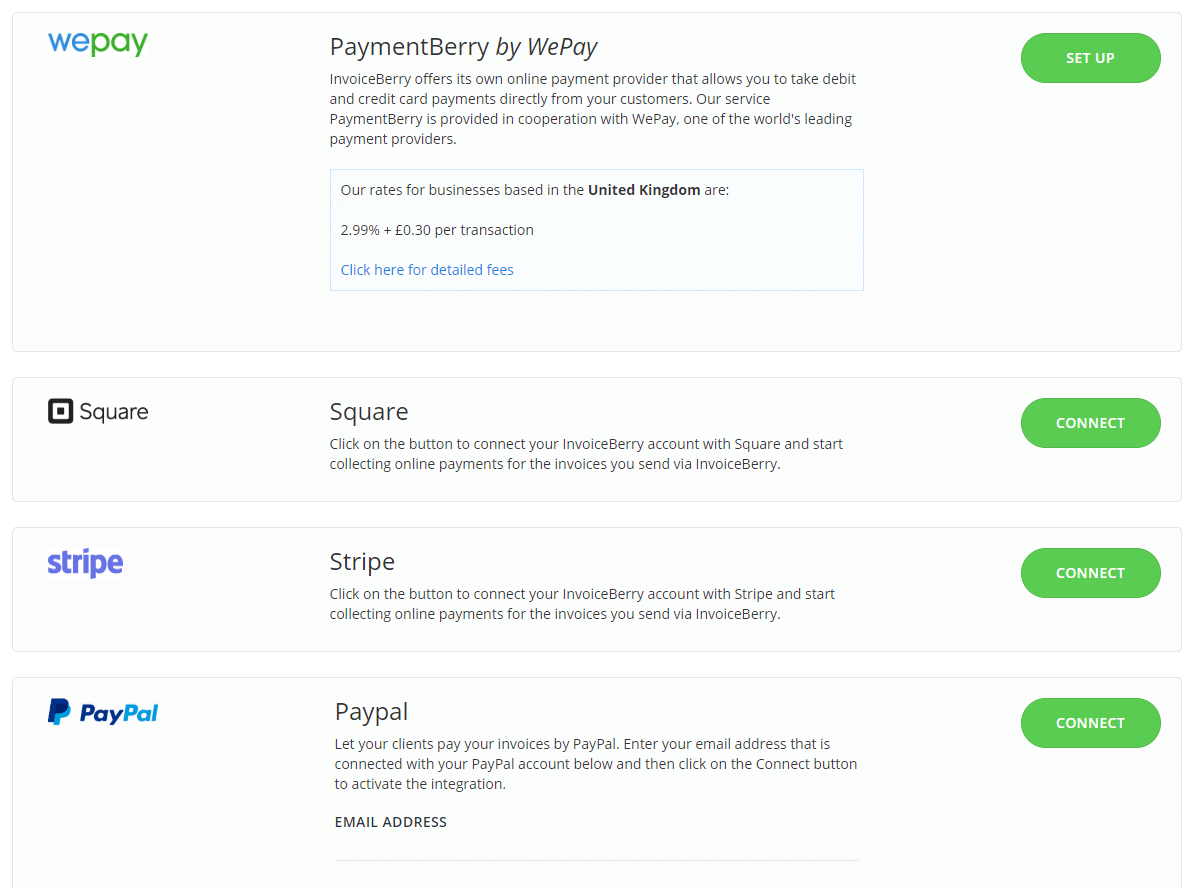
There are a variety of payment options you can use to secure compensation from your client. If you press on “Add a new payment method” button to browse all available payment options – listed in the image above.
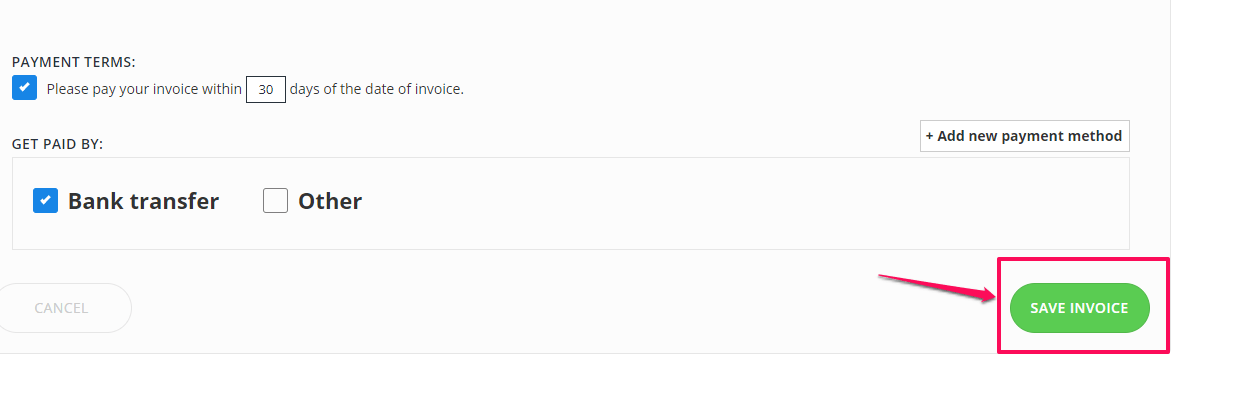
Once all the necessary information has been entered, and the payment method selected, press “Save invoice” button to save the invoice you have created.
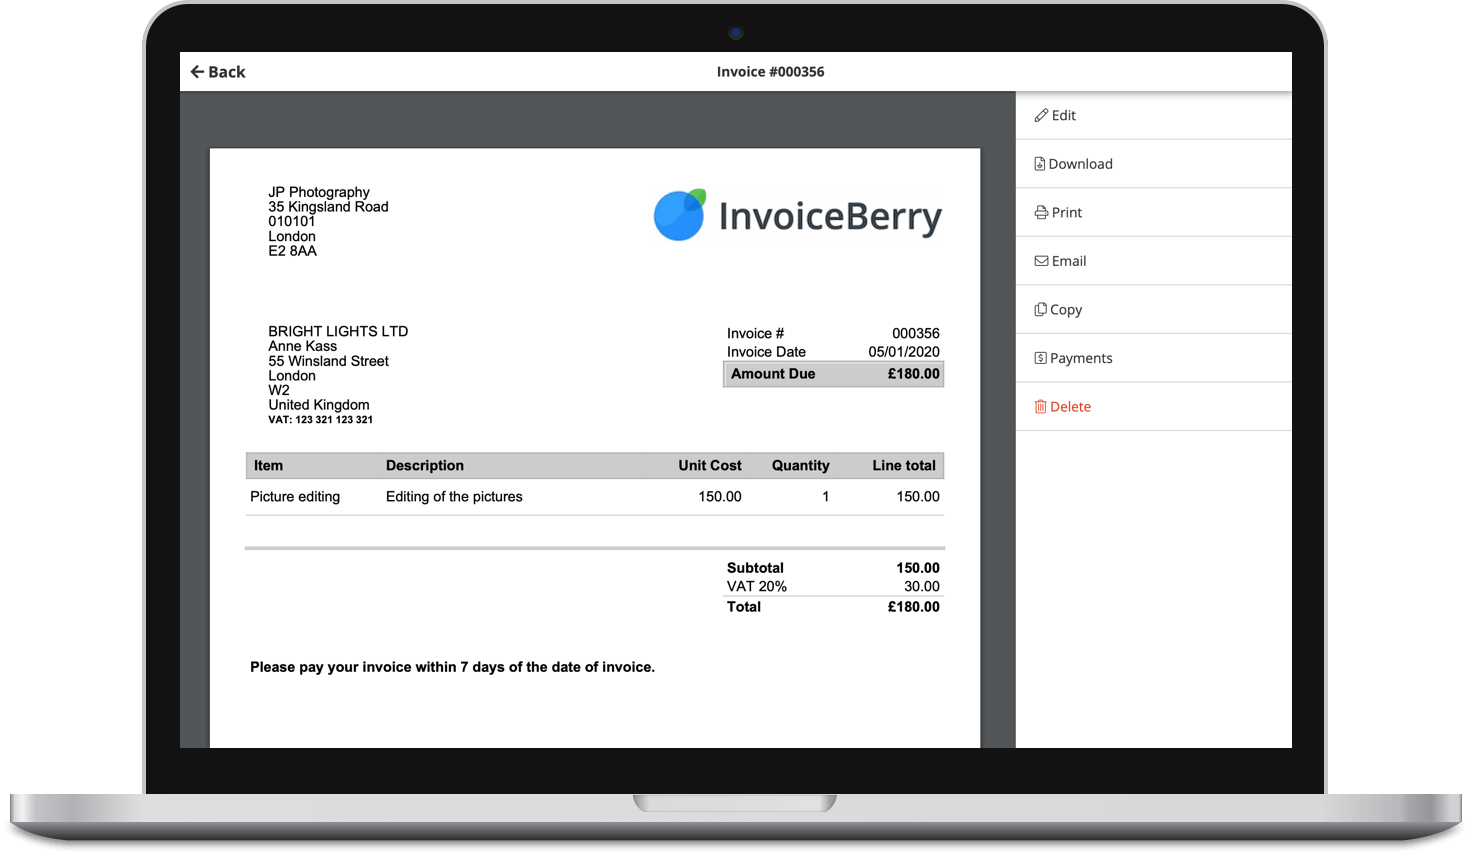
Sending invoices to your client
Once you have pressed “Save invoice”, you will be greeted with the preview of your created invoice.
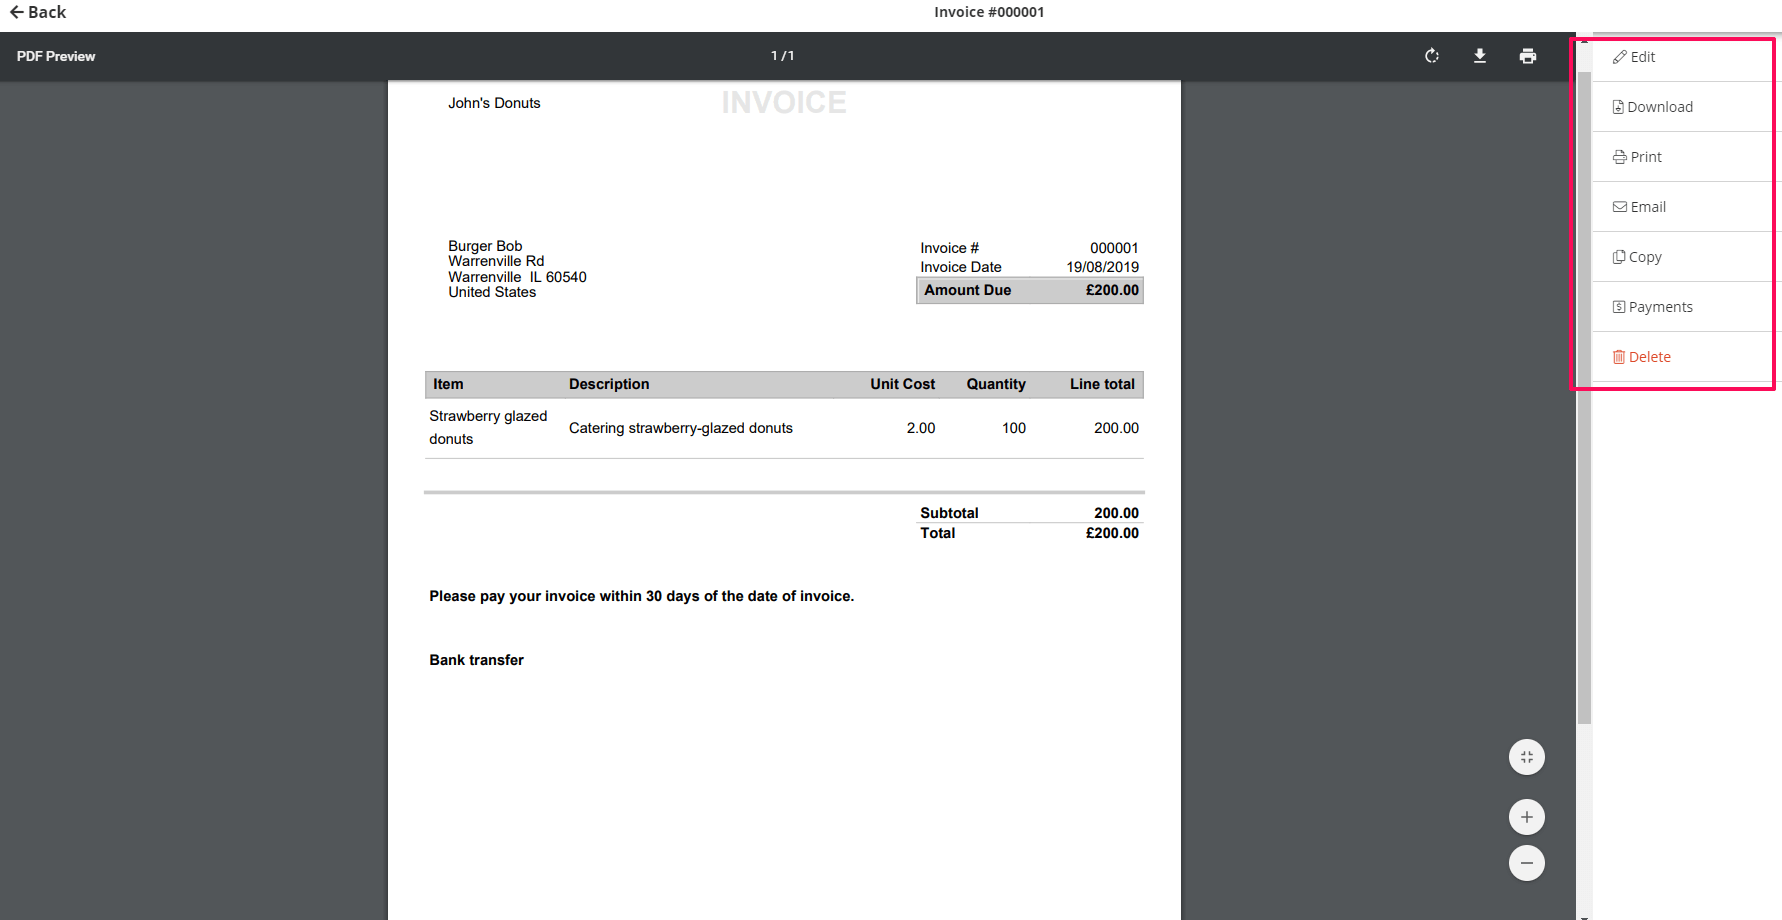
The invoice can still be edited, so if you see any errors, don’t worry. On the right had side of the screen will be a menu with the edit option, as well as invoice delivery methods.
When you press “Download” button, the invoice will be saved on your computer in a PDF format.
If at any point you need to change the payment method to accommodate your client quickly, you can do that here – no problem.
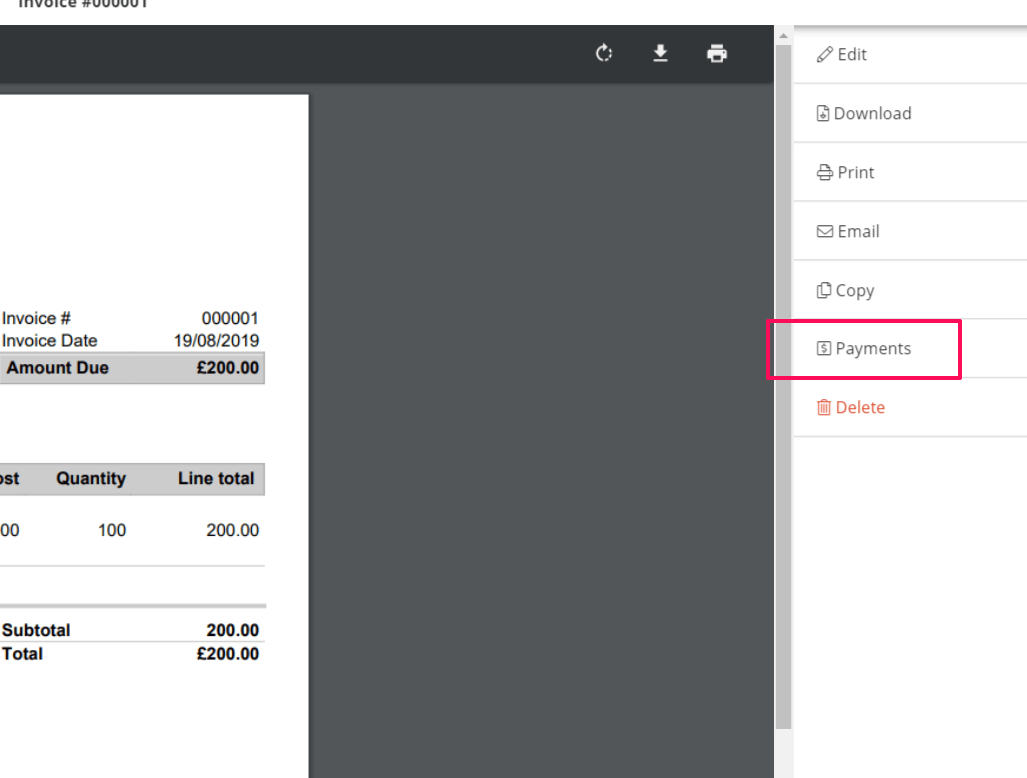
Press the “Payments” button on the right side.
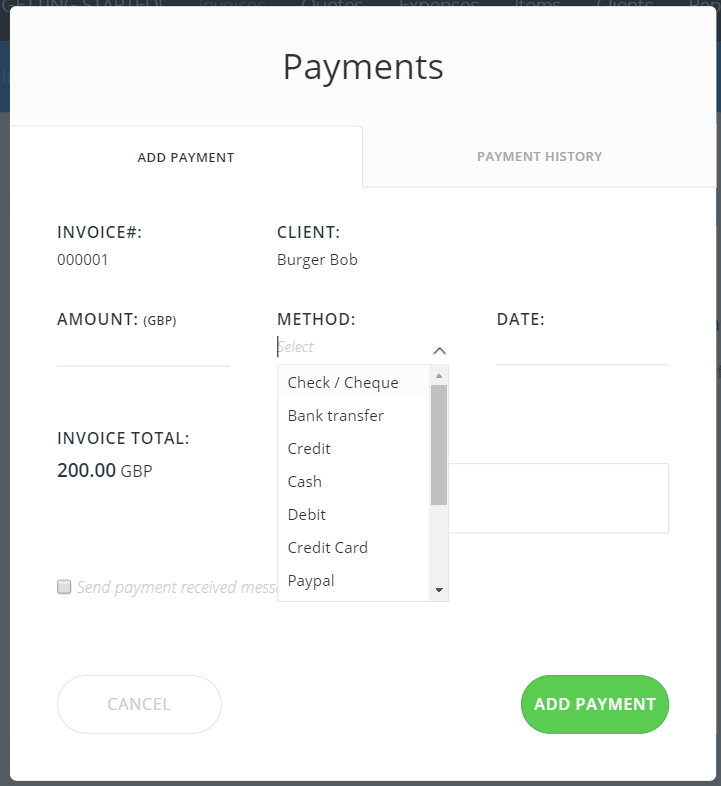
On the Payments page, you can quickly change the method with which your client can pay you. Once you have made the changes, press “Add payment”.
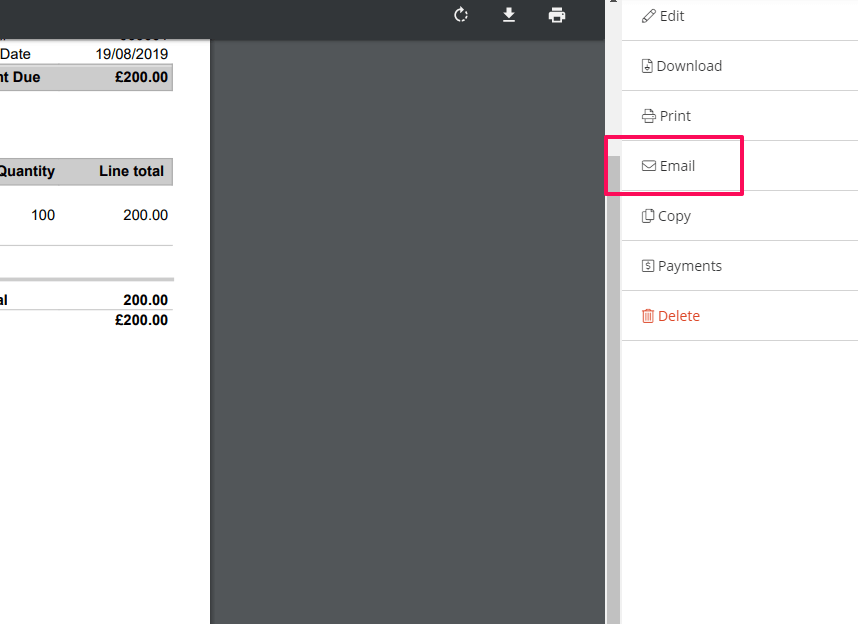
Once you’re ready to send your first invoice to your client, you can either print it out and send it via post, or use email. Emailing the invoice is recommended since the delivery time is almost instantaneous.
Pressing “email” on the right hand side will open up another page.  Here you can select the invoice recipient, send the invoice to yourself, as well as include a short message that will accompany the invoice.
Time for you to press the “Send” button! Your first invoice is about to be delivered.

Here is how the emailed invoice looks like from the recipients point-of-view.
All you have to do now is wait for the client to pay you through the variety of payment options available on InvoiceBerry.
Small Business Finance 101
Download our free guide to learn the fundamentals of finance that will help make your small business more efficient and successful.