InvoiceBerry launches Zapier integration: Connect InvoiceBerry with over 750 apps
Written by Mindaugas on November 30, 2017
Invoicing and monitoring finances is an essential part of business operations. InvoiceBerry is the online invoicing platform that allows you to not only create and distribute invoices, but manage all your finances online.
Now the convenience of InvoiceBerry no longer stops there. We are glad to inform you that InvoiceBerry has now integrated Zapier and all of its wonderful functions on the same platform.
Try our online invoicing software for free
Accept online payments with ease
Keep track of who's paid you
Start sending invoices
Connect your InvoiceBerry with over 750 other software applications to help you streamline your workflow. Tasks that were time consuming before can now be easily automated to work cohesively between applications of your choice.
The Functionality
With a new function being implemented, you may be wondering how to access these great Zapier features on your InvoiceBerry account. Wielding this great power won’t be difficult at all – we are here to give you a quick walk-through.
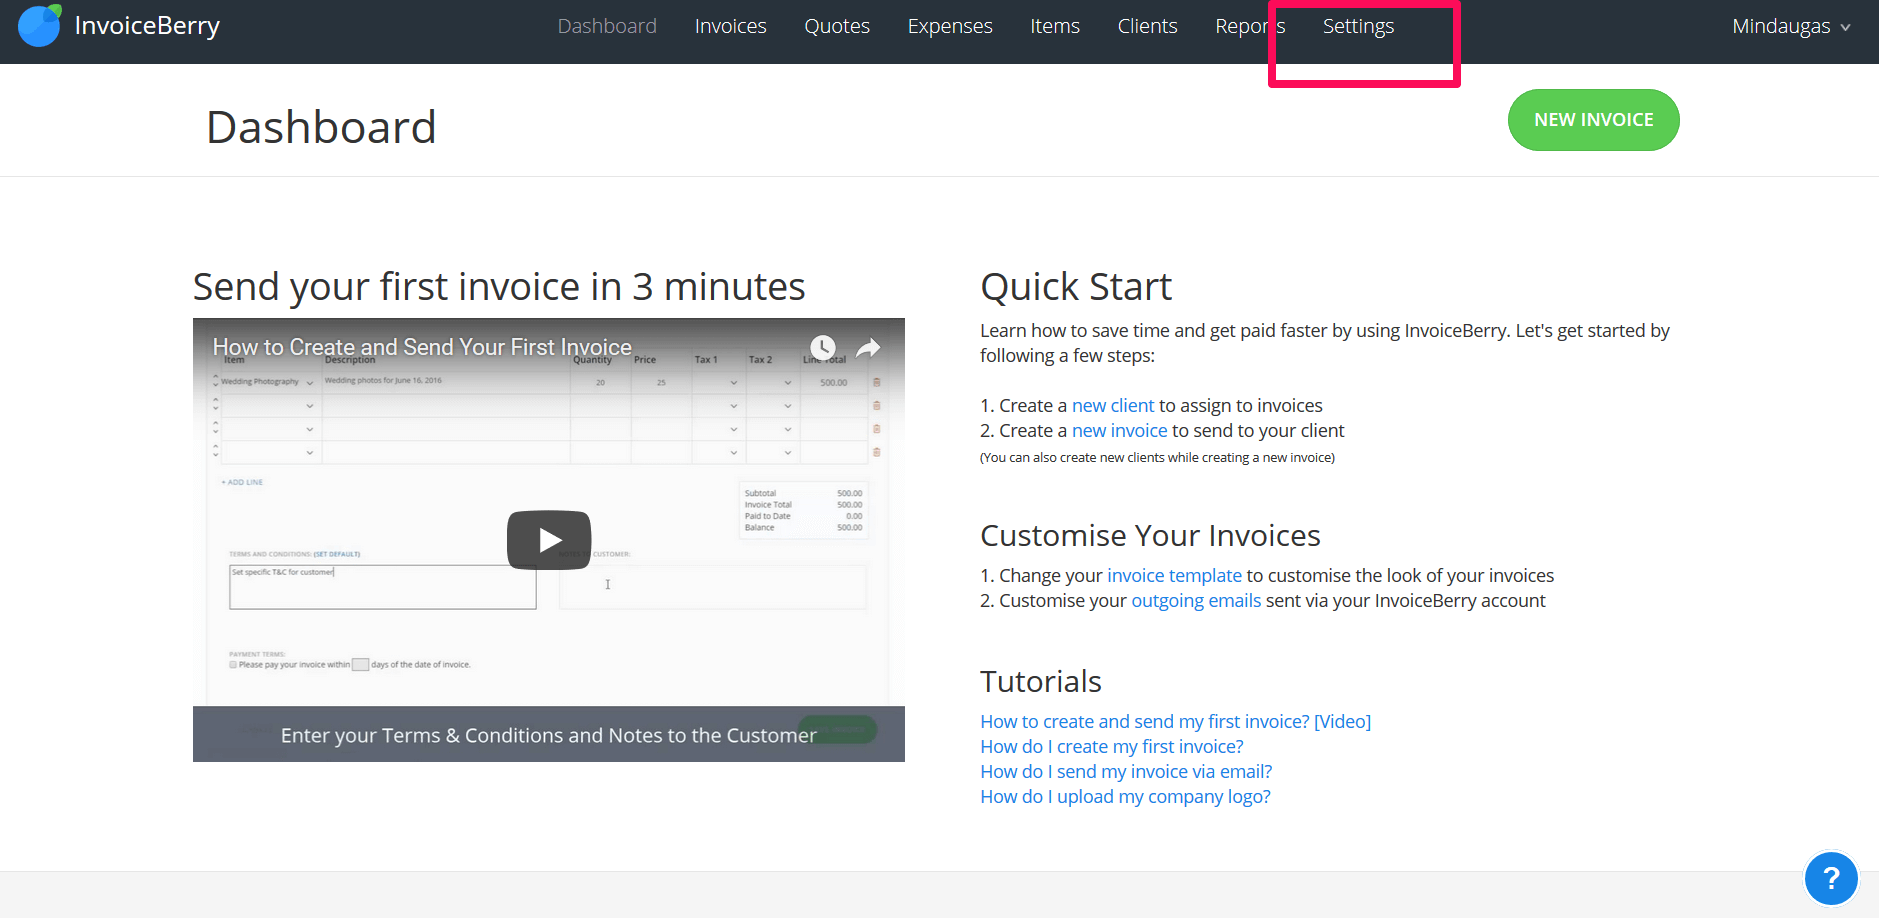
InvoiceBerry Dashboard
When you login and arrive at your InvoiceBerry dashboard, you will notice that nothing has changed. All this new Zapier integration magic will be found under your “Settings” button in the menu above.
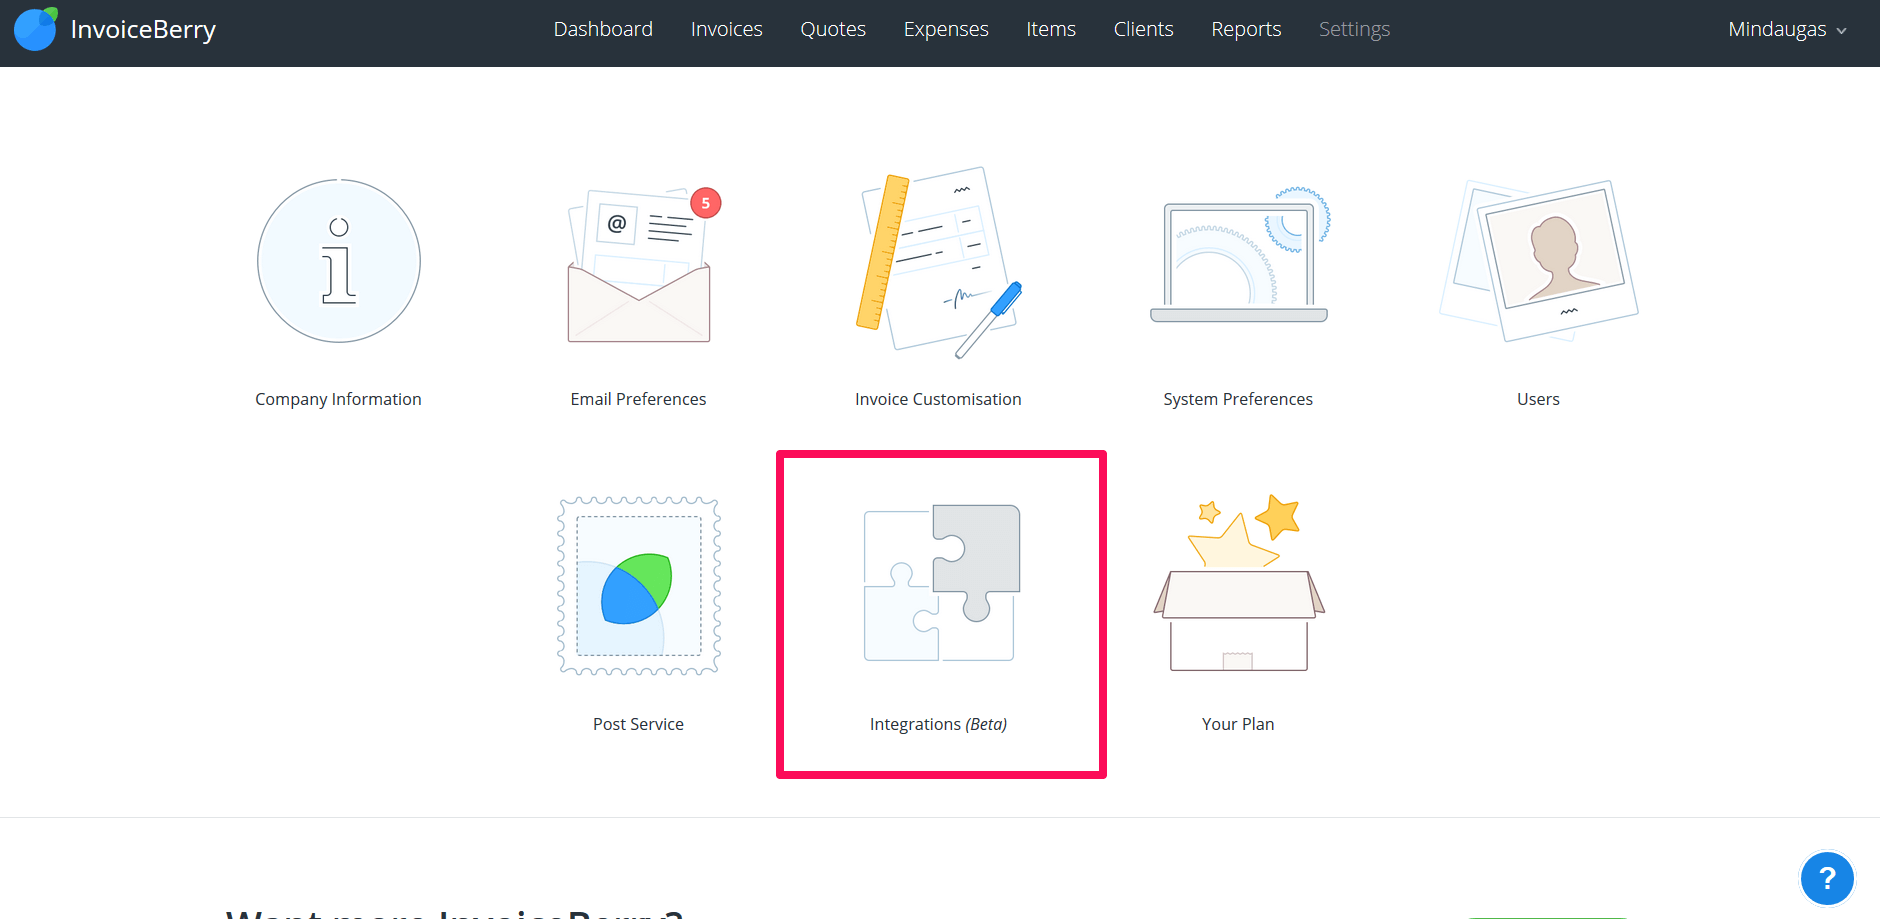
Once you have clicked on the “settings” button, you will be taken you a menu that contains all your customization options, as well as the newly implemented “integrations” button. Don’t be afraid – go ahead and click on it.
What Lies Within?
So you have discovered the new Zapier integration on your InvoiceBerry account. Time to see what goodies can be found inside.
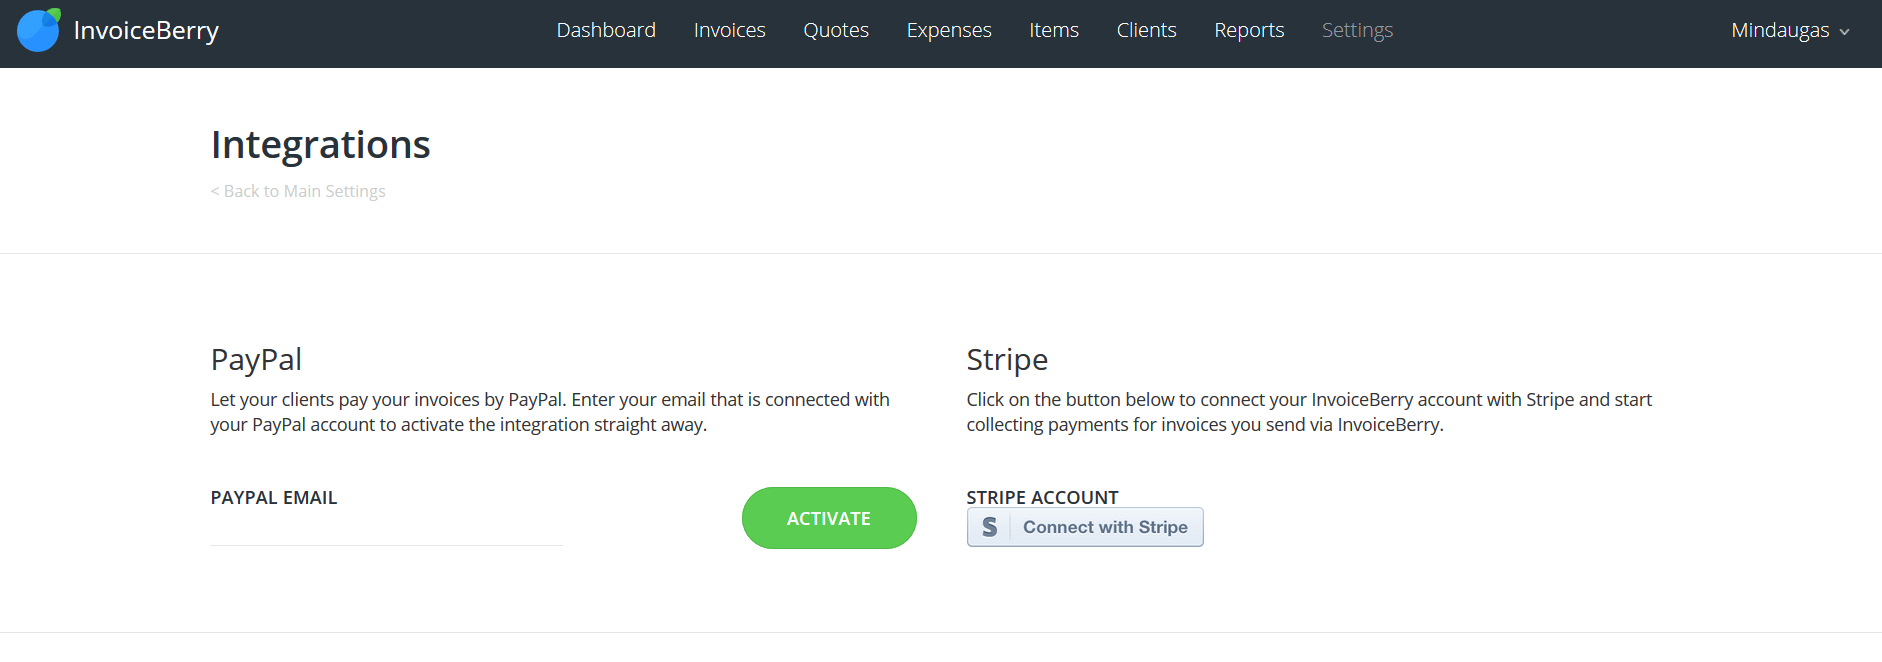
Of course, InvoiceBerry wouldn’t be a proper invoicing software without payment integration. So that will be the first thing you will encounter after pressing “integrations”.
If you scroll down, you will notice other available software that will work with your InvoiceBerry account.
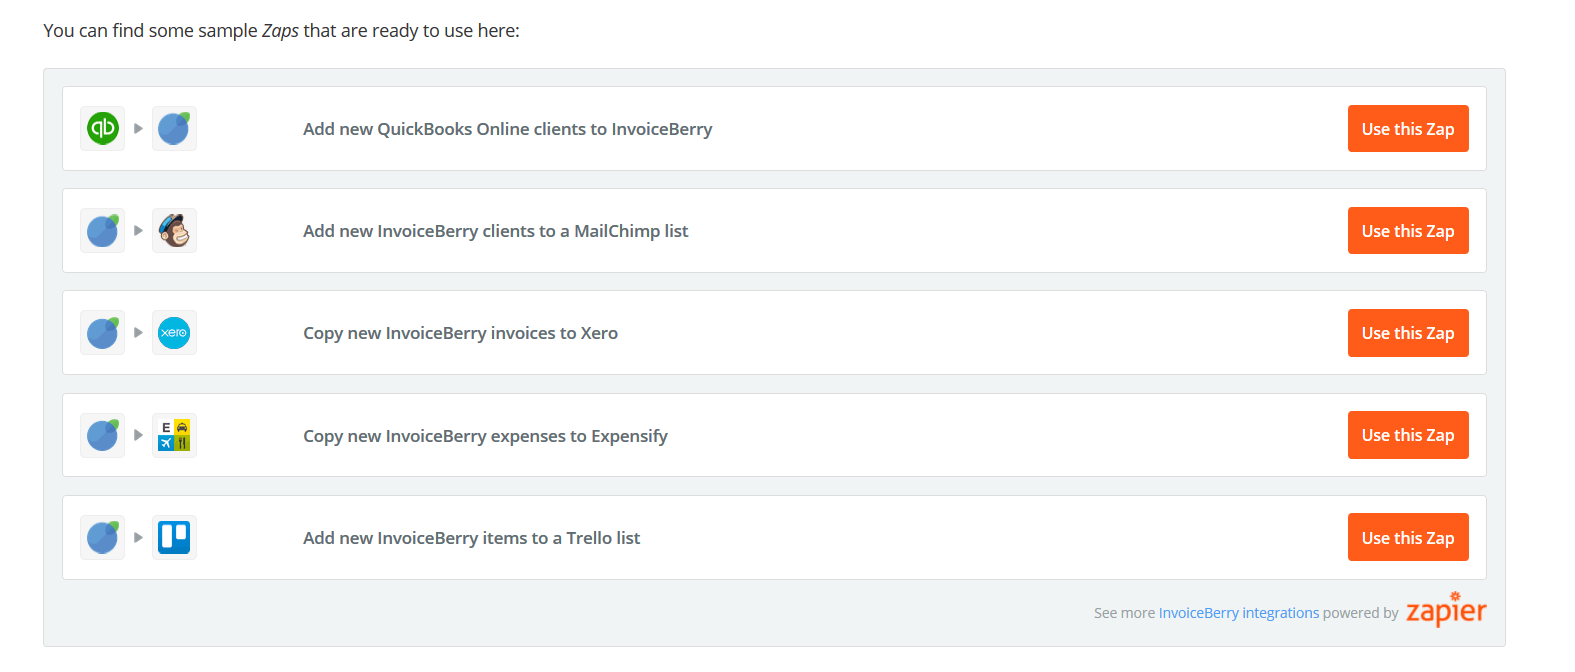
As you can see on the bottom right, this great functionality is powered by our friends at Zapier.
Time For An Example
Examples are always nice, can really aid individuals during the whole learning process. For this example, I will integrate MailChimp – a popular email tool for many marketers out there.
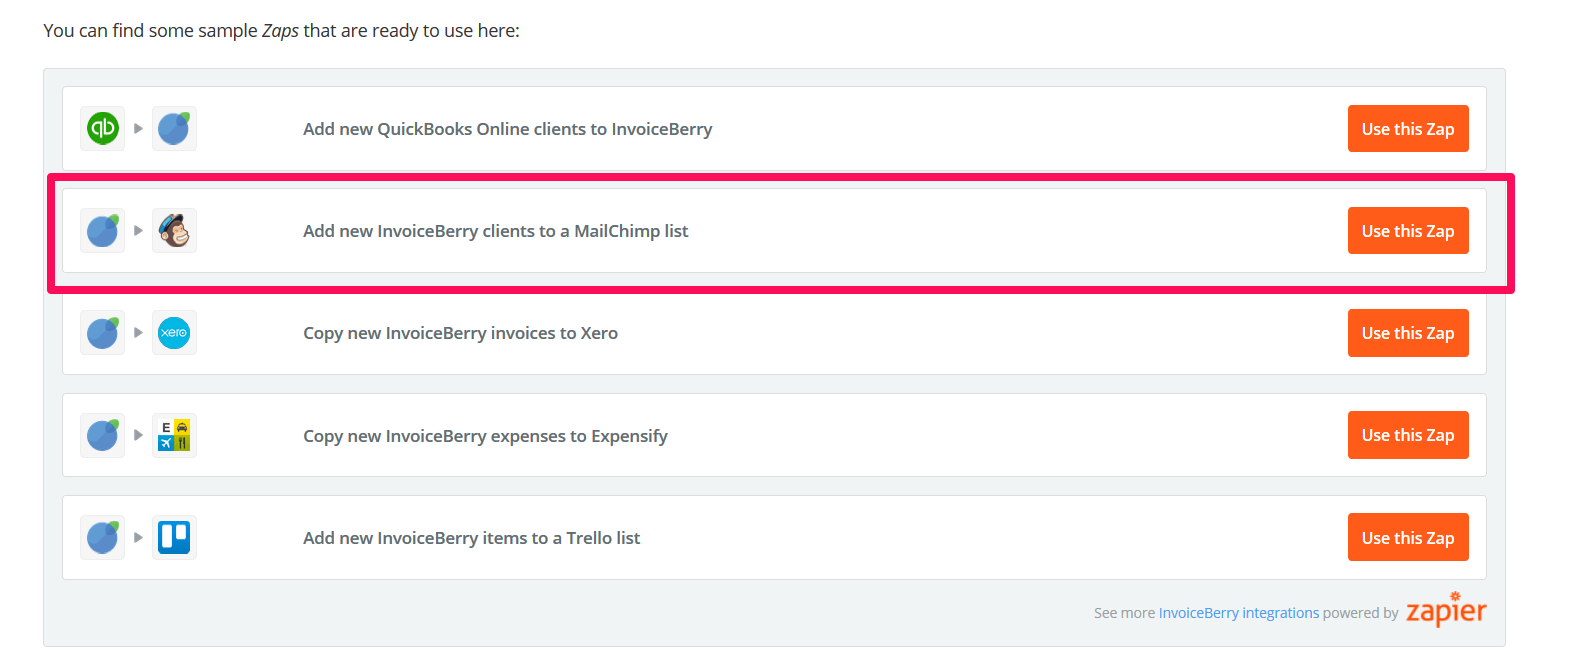
When you press on “use this zap”, you will be greeted by a confirmation screen. It will give you give you a quick summary of what functionality is available with that particular “zap”.
Here is what it looks like after you have selected MailChimp zap –

On the bottom of the page, you will notice a blue button that says “create this zap”. Click it.
You will be taken to your MailChimp login screen, so you know the drill – go ahead and login into your account to proceed with the integration process.
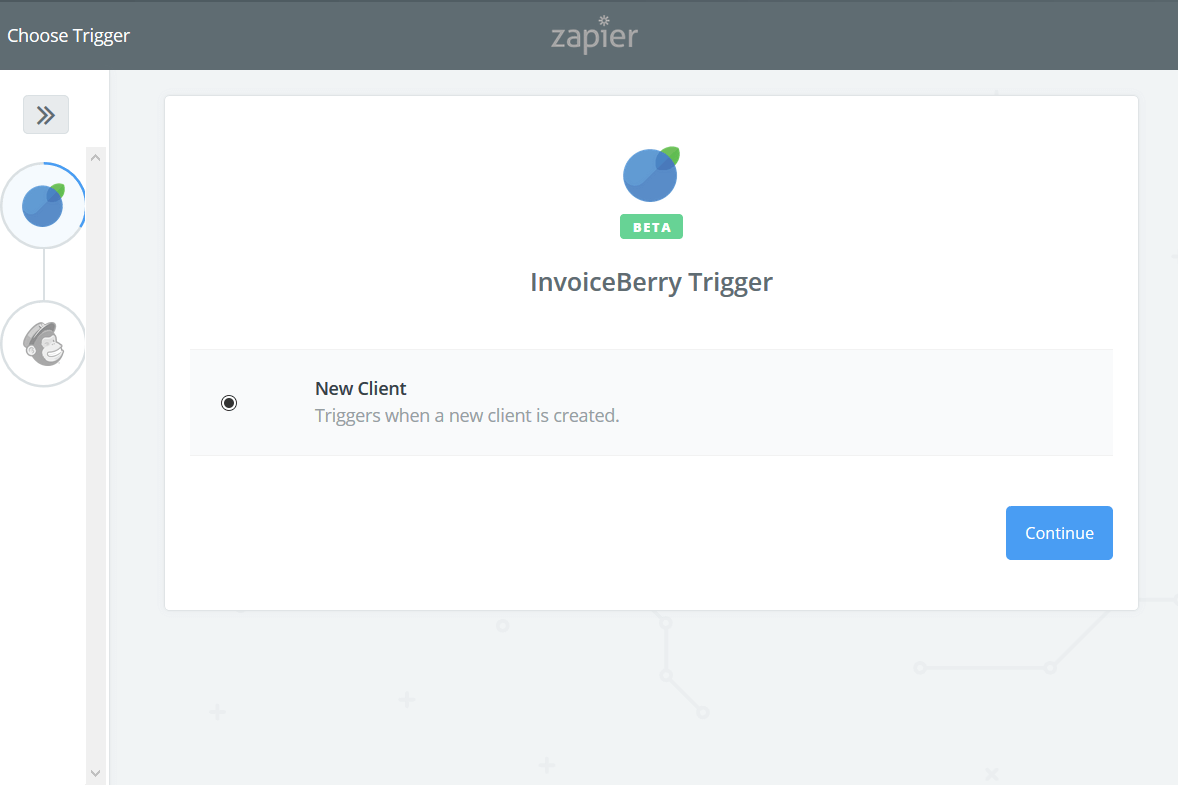
Here is where you select your trigger. As you can see in the picture above, the option has already been selected. In this case, any new client that’s been entered into your InvoiceBerry account, will be automatically transferred into your MailChimp mail list. Pretty neat stuff if you ask me.
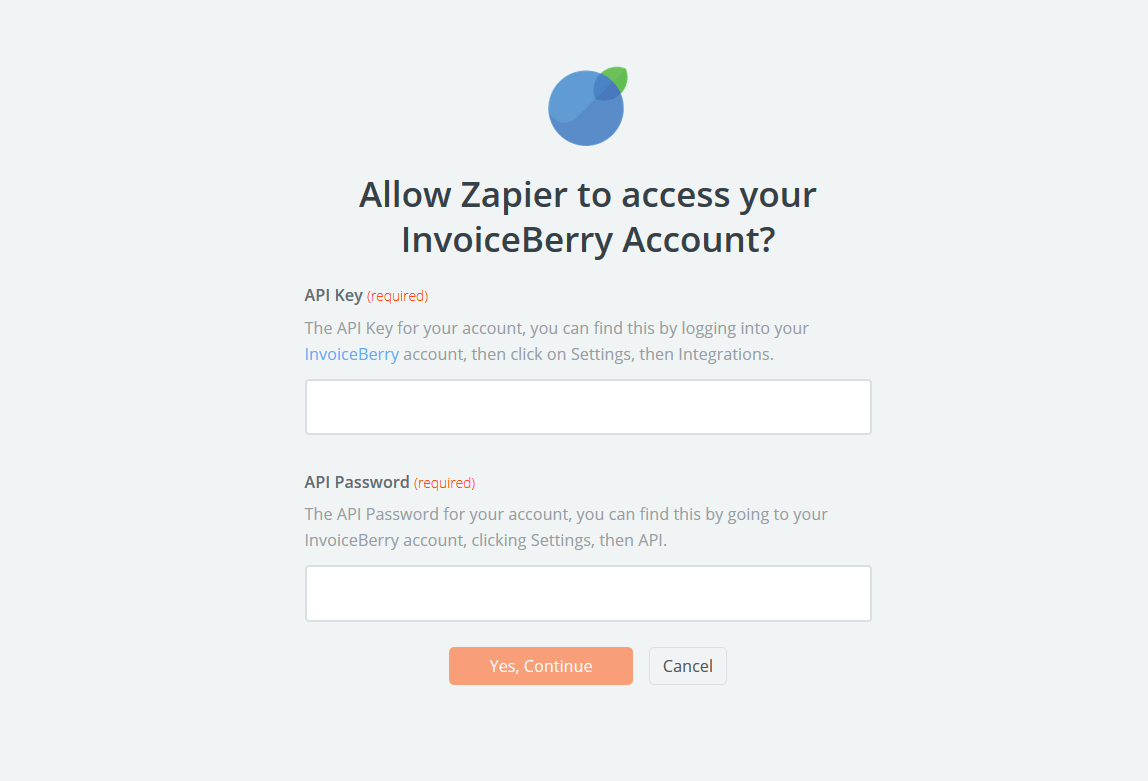
As the final step to complete integration, you will need to enter your API key. This is provided on the “integration” dashboard of your InvoiceBerry account.
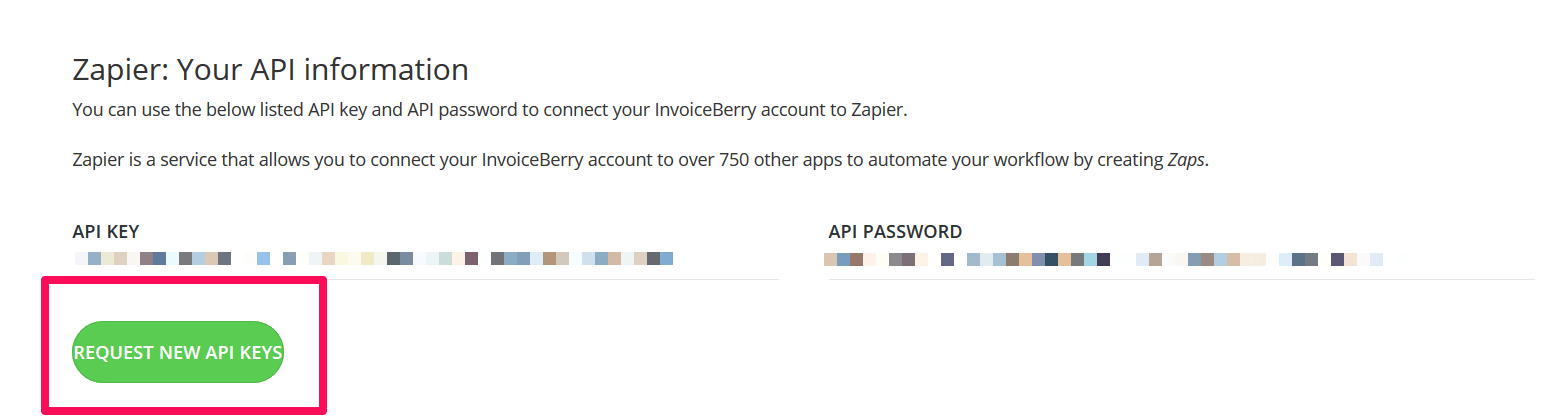
Once you have generated the API key for yourself, just copy and paste it in the field provided. This will complete your MailChimp integration.
Test
After you have gone through the whole process, you may want to test this out and see if everything integrated properly.
You will be brought to a screen, with the integrated InvoiceBerry account, and a “test” button on the right. In the picture I have provided for you, I have already done the test myself, so I don’t have it. The location has been highlighted.
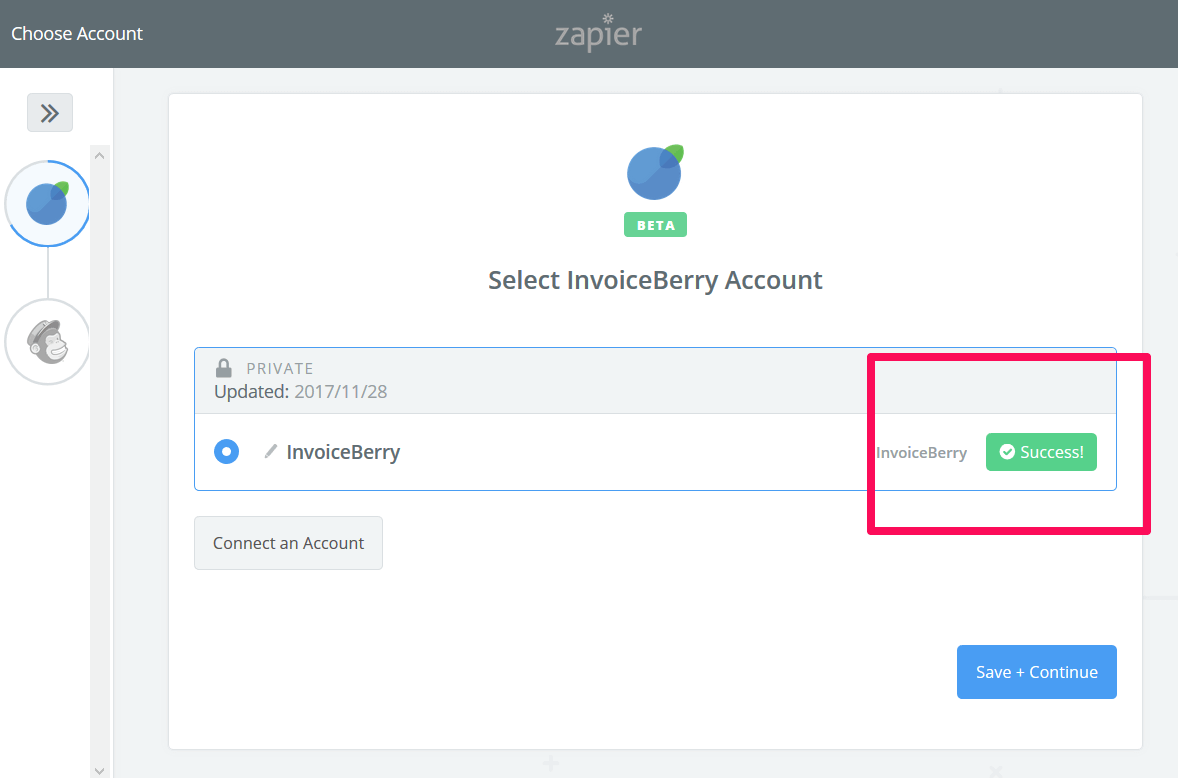
If you have used the right API key and password, you will get the “success” message.
Here is where you can “fetch” your client list from within your InvoiceBerry account. (Note – only the new clients that have been entered in after the integration will be uploaded on MailChimp account too.)
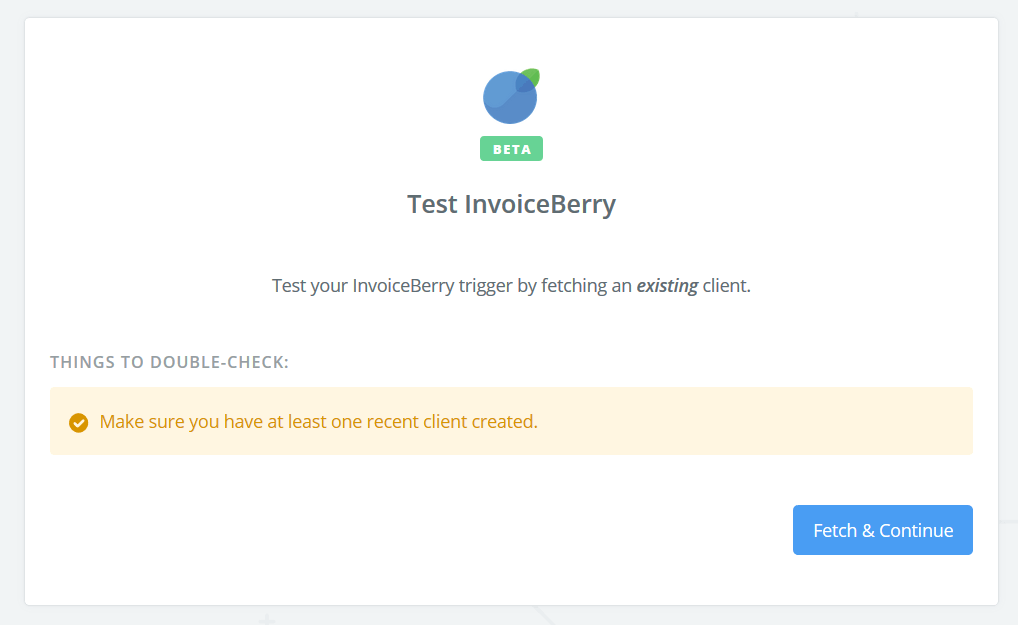
Press “fetch and continue” if you are ready to retrieve the client list from your InvoiceBerry account.
This is what will see after you proceed –
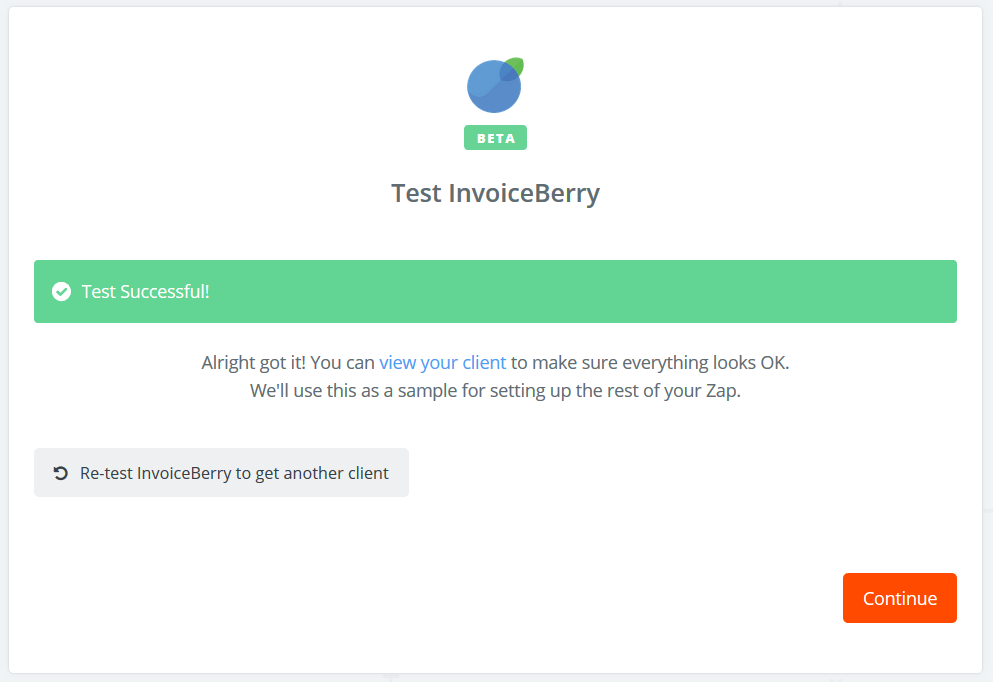
After this, you will be asked to complete the same test with MailChimp as you did from your InvoiceBerry account.
Fully Integrated
Congratulations! You have now completed your InvoiceBerry and MailChimp integration. Of course this was just an example for you to get the feel of the process and how it all works. After all, this is a new function that’s been made available to you on InvoiceBerry.
The process is similar with other software platforms that is supported by Zapier integration.
All that’s left for you is to start taking advantage of the new functions on InvoiceBerry and save yourself time with the help of Zapier.
Small Business Finance 101
Download our free guide to learn the fundamentals of finance that will help make your small business more efficient and successful.