
Setting up a business newsletter is an essential component of digital marketing nowadays. Unfortunately, email marketing is often overlooked these days, especially since the hype of social media marketing that allows brands to utilize hashtags, stories, and live videos to boost their campaign.
However, you can miss out on the growth potential of your business if you ignore sending newsletters to your audience as a part of your branding and marketing strategy!
Try our online invoicing software for free

Accept online payments with ease
Keep track of who's paid you
Start sending invoices
There are a lot of email marketing platforms that you can opt to send off your business newsletter. But today, we are going to outline a step-by-step guide to send one using Mailerlite. So, what are the advantages of Mailerlite compared to other email marketing platforms?

Why You Should Choose Mailerlite For Your Business Newsletter
While most email marketing platforms are pretty straightforward to use, Mailerlite has a few distinctive features that make it easier to use compared to other popular email marketing services.
#1 User-friendly interface
Mailerlite offers a lot of advanced features that are quite easy to follow. For example, compared to Mailchimp, even though it has more automation features, the latter is not an email marketing service that you can excel overnight due to its complexity.
The dashboard page on Mailerlite is quite simple, even for beginners. Mailerlite pretty much lives up to their name, in which they make email marketing feel like a light job.
#2 Data protection
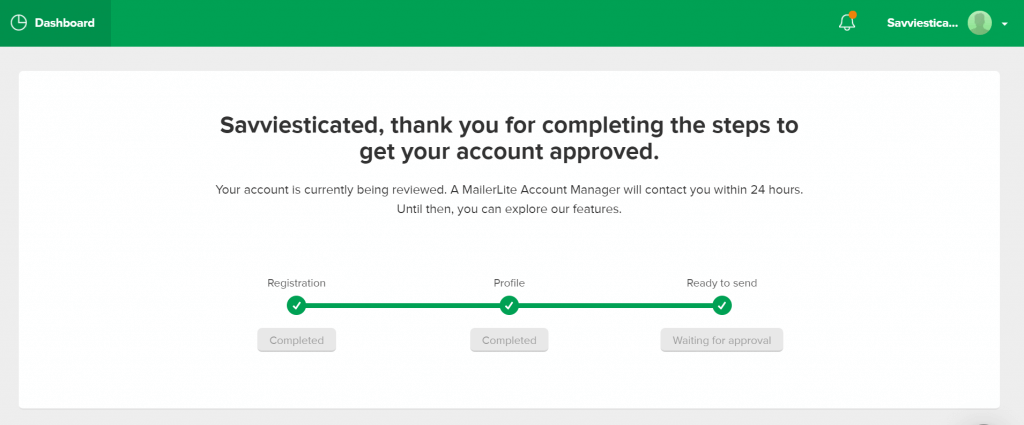
Mailerlite takes the necessary measure to make sure that your data is safe with them. Their security team monitors their platform 24 hours, and they will review your account within 24 hours after you sign up for a new account on Mailerlite.
While we can count it as an advantage of Mailerlite, this system can be a bit troublesome. More often than not, they will end up rejecting your account due to unsuitability with their algorithms. However, you can always contact their security team to confirm why they can’t approve your account.
Once you contact their team, they usually take some time to review your data and may approve your account with the adjusted plan that fits.

#3 Free for up to 1000 subscribers
While their premium plan is considered affordable, you can still use their free plan for up to 1000 subscribers. However, the number of subscribers they allow you to have for a free plan may vary.
How to Send Your First Business Newsletter Using Mailerlite
So you signed up for Mailerlite, you’ve already set up a pop-up form or embed it into your website. Now, it’s time for you to send your first newsletter to your subscribers!
Here are some guides to successfully send off your business newsletter using Mailerlite.
Step 1 – Choose the type of campaign you’re going to send for your newsletter
First thing first, head over to “Create campaign” button on the top right of your dashboard and pick the type of campaign you’re going to send to your audience.
There are four types of campaigns that you can opt for, and here is what you need to know about each one of them!

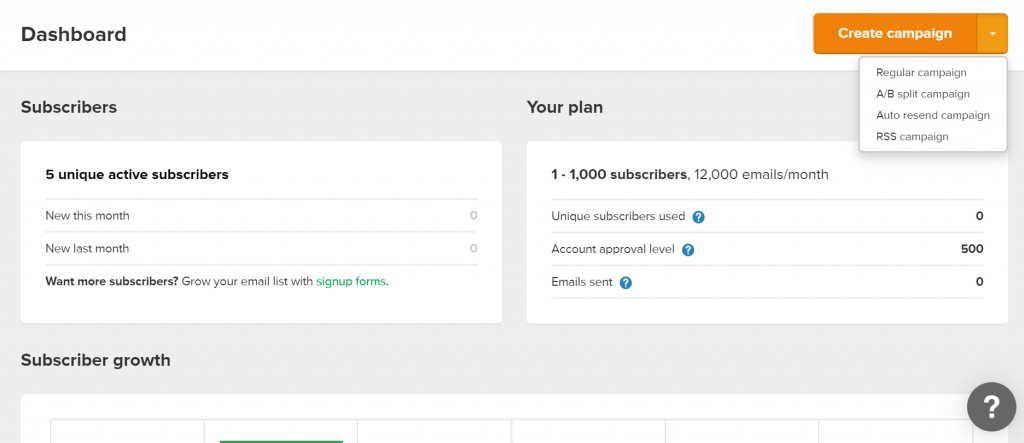
- Regular Campaign is a stand-alone newsletter that you can set up and send to your selected audience.
- A/B Split Campaign is the creation of two or more variants of newsletters to find out the best version to optimize your audience’s conversion.
- Auto Resend Campaign is currently only available for premium plan users. Auto resend campaign works the same way as the regular campaign, the only difference is that Mailerlite will automatically resend the newsletter to those who did not open it the first time.
- RSS Campaign is the automated newsletter that will notify your audience whenever you publish a new post for your website.
If you just get started with email marketing, A/B Split Campaign can be a good start to see the campaign that works best for your audience. Otherwise, you can also set up RSS Campaign and add your business website to send the recent updates on your business to your subscribers.
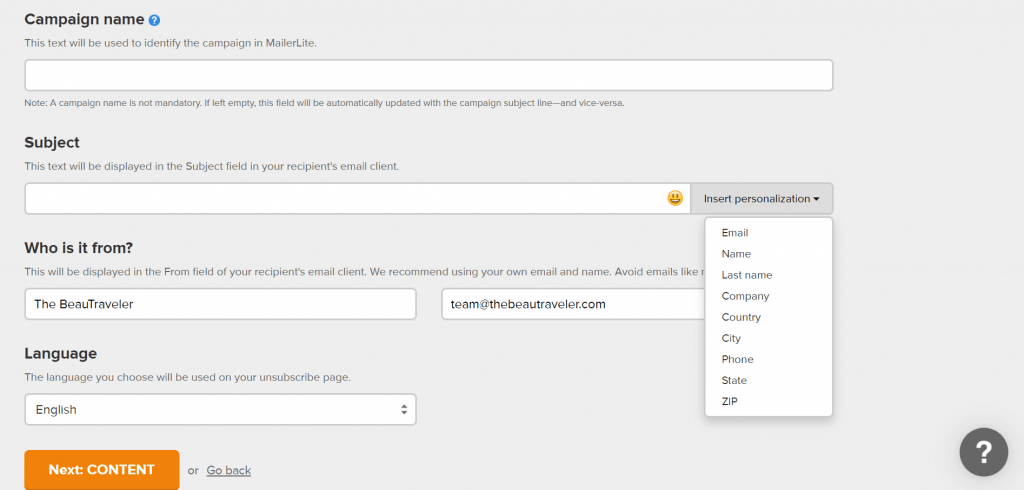
Step 2 – Set up your campaign detail for the newsletter
Assuming that you already have a list of your subscribers, we can start the tutorial with a regular campaign, so the next step will be to set up the first newsletter you’re going to send.
Name the campaign, and add the subject of the email for your first newsletter. Then, you can easily personalize it using the ‘insert personalization’ feature on the page. Once it’s all done, click the ‘Next: Content’ button at the bottom.

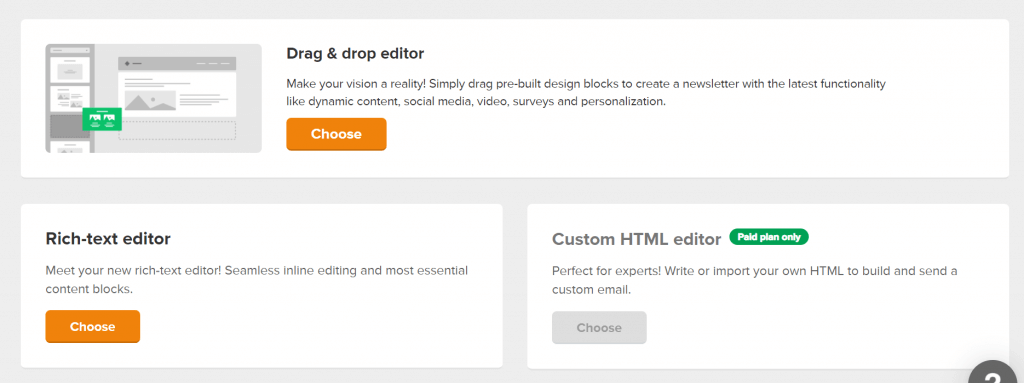
Step 3 – Choose how you would like to design your newsletter
There are three ways to design your newsletter using Mailerlite.
First, there’s a drag-and-drop editor where you can use the pre-built design to customize according to your branding style and color. It is probably the easiest way to design your newsletter as they provide templates you can opt for and personalize.
You can also pick the rich-text editor, which offers seamless inline editing with essential content blocks for your newsletter. You can start creating the draft from scratch with a relatively easy feature to customize with this option.
If you’re in the paid plan of Mailerlite, you will also have an option to use Custom HTML Editor. While this requires you to have at least a basic knowledge of HTML, it is probably the best way to create a newsletter if you’re an expert who knows how to code!

Step 4 – Check the outcome on the preview mode
Now you’re done creating the newsletter, the next thing to do is double-check and see the preview of how it will look from the audience’s point of view. Head over to ‘Preview and Test’ feature, and choose ‘Preview Mode.’
The ‘Preview Mode’ will allow you to see how the newsletter looks like from both desktop and mobile. It is pretty handy to see if your email is responsive for all devices, given the idea that the way your audience receives your newsletter may vary.


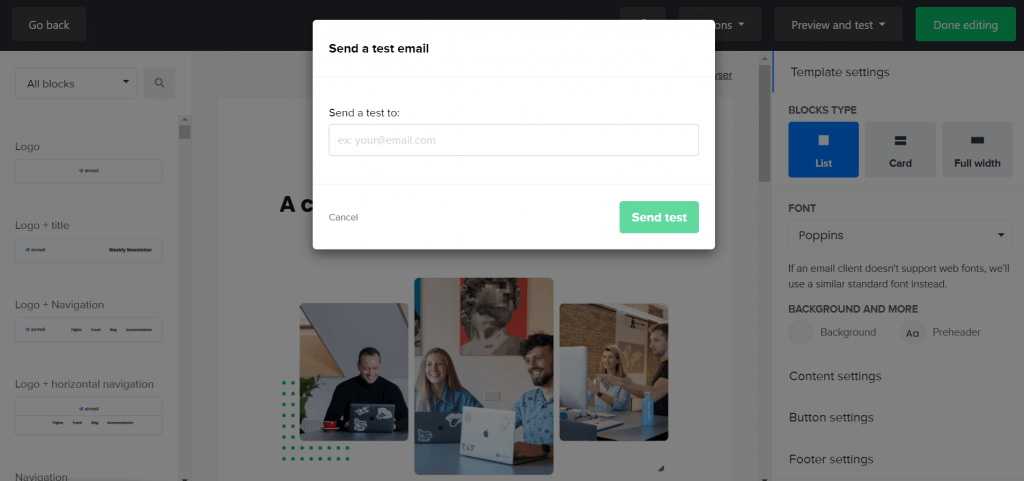
Step 5 – Send a test email to make sure that it works properly
If everything looks great, go back to the editor, and it’s time for you to make sure that your subscribers will receive your email safe and sound. And that’s by sending a test email to make sure it goes directly to your inbox.
Go to ‘Preview and Test’ button again, and this time click ‘Send a test email.’ There will be a pop-up that enables you to send one for a trial; submit your personal email address to see if you can receive it with no problem.
Once it’s good to go, click ‘Done editing’ on the top right of your monitor, and you will get directed to the Recipient section.

Step 6 – Select the recipient
In the Recipient section, you will have the three options; Basic, Advanced, and Legacy.
On the Basic and Legacy tab, you can exclude recipients by clicking the “Exclude” option that appears on the page. A red X will appear when the list of subscribers is excluded from your campaign.
The Advanced tab enables you to exclude subscribers from specific categories, whether it is from Groups, Segments, and even Time Zone!

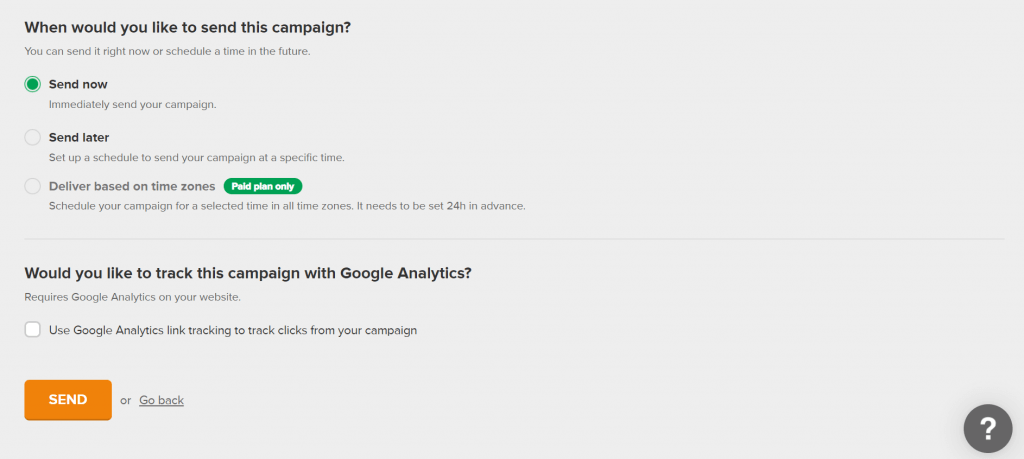
Step 7 – Final review and send your first newsletter!
Once the recipient list is all set, click ‘Next: Review and confirm’ for a final review to see if all the campaign details are correct. Make sure there is no typo on the email subject, and check the preview again one more time before you send out the email directly to your audience.
Click ‘Next: Schedule’, and you’ll go directly to the Schedule section, where you can choose to send the newsletter either promptly or later. If you’re on the paid plan, you can even send the email at a specific time according to the time zone.

Conclusions
Mailerlite is an email marketing platform that makes it easy to plan out your business newsletter. Whether you want to grow your email list through your landing page or to send email marketing automatically, the platform makes it relatively easy to accomplish all.
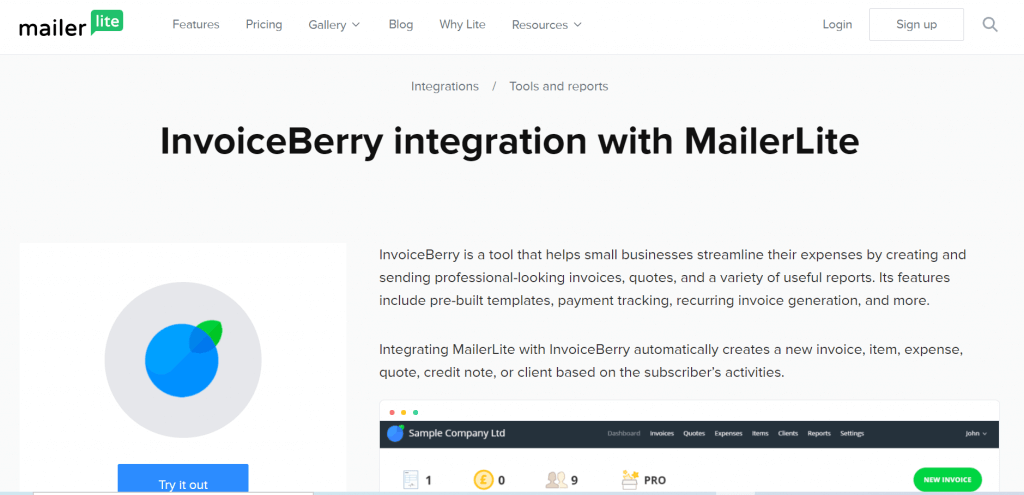
On top of that, Mailerlite also offers an extensive integration feature that enables us to connect it with various platforms. The good news is that you can now integrate Mailerlite and InvoiceBerry by connecting them through Zapier.